The CSA Food Project

The CSA Food Project

Monday, August 31, 2009

Eating the Rainbow - Part 1 of 3


Eating the full assortment of fresh raw fruits and vegetables on a regular basis is the key to giving your body the nutrients it needs to build cells right and strengthening your immune and detoxification systems so they can do a better job of fighting off disease and aging.

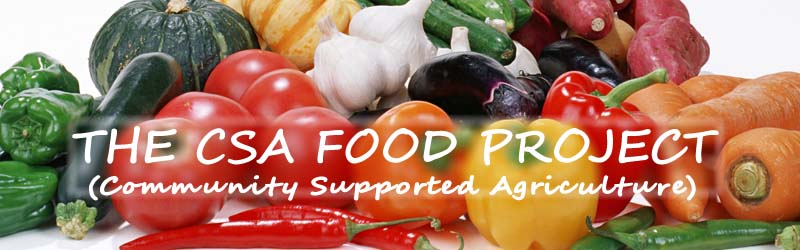
The pigments contained in produce, the component that gives each item its color, actually helps the body in its own unique way. In fact, the vegetables color is a clue to the vitamins and minerals that can be found inside.

The new nutritional goals are for individuals to eat a minimum of 5 servings of fruit and vegetables a day, with a goal of 9 servings of fruit and vegetables. A serving consists of:

  • 1/2 cup canned, frozen fruits or vegetables
  • 1 medium piece of fruit
  • 3/4 cup of fruit or vegetable juice
  • 1 cup of raw leafy greens
  • 1/4 cup dried fruit

RED produce contains fiber, vitamins and phytochemicals, such as lycopene and anthocyanins, which help prevent cancer, neurological and aging diseases, improve diabetes and increase your chances at a healthy heart. Examples:

  • beets
  • cherries
  • cranberries
  • kidney beans
  • pink grapefruit
  • pomegranates
  • quinces
  • radicchio
  • radishes
  • raspberries
  • red apples
  • red bell peppers
  • red chiles
  • red currants
  • red grapefruit
  • red grapes
  • red onions
  • red pears
  • red plums
  • red potatoes
  • rhubarb
  • strawberries
  • tomatoes
  • watermelon

ORANGE / YELLOW produce contains fiber, vitamins and phytochemicals, such as carotenoids, which aid in the health of mucous membranes, vision, to prevent heart disease, cancer and strengthen the immune system. Examples:

  • apricots
  • butternut squash
  • cantaloupe
  • carrots
  • corn
  • golden beets
  • golden kiwifruits
  • golden raspberries
  • grapefruit
  • kumquats
  • lemons
  • mandarins
  • mangoes
  • nectarines
  • orange bell peppers
  • orange cauliflower
  • oranges
  • orange tomatoes
  • papayas
  • passion fruit
  • peaches
  • pears
  • persimmons
  • pineapples
  • plantains
  • pumpkins
  • rutabaga
  • sweet potatoes
  • tangelos
  • tangerines
  • yellow apples
  • yellow bell peppers
  • yellow kiwifruits
  • yellow peppers
  • yellow potatoes
  • yellow summer squash
  • yellow tomatoes
  • yellow watermelons
  • yellow wax beans
  • yams

Saturday, August 29, 2009

Strawberry Granita (Any Berry Granita)


This is a simple summer favorite that the kiddies and adults will go nuts over. It is a dessert that is intense in flavor and color. Remember that you eat with your eyes before the food ever hits your mouth.

The trick to this recipe is to use slightly overripe berries. The recipe is flexible, so feel free to experiment with other berries. Same rule applies - go for ripe to slightly overripe.

While fresh berries produce the best results, this is a year round recipe. Replace the fresh berries for frozen, thawed berries. Just add a little more sugar to the frozen berries.

Ingredients

  • 2 pounds slightly overripe strawberries
  • 1 cup powdered sugar, sifted
  • Juice of 1 lemon (about 2 tablespoons)
  • 8 teaspoons heavy cream
Process
  1. Gently wash and hull strawberries, then place in a food processor and process until crushed

  2. Working in batches, press puree through a fine sieve to extract seeds (discard seeds)

  3. Whisk powdered sugar and lemon juice into strawberry juice - it should seem a little too sweet and a little too sharp - both tastes will be muted slightly when frozen

  4. Pour puree into a bowl or large tub - ideally the mix should be no deeper than about 1 inch

  5. Freeze for at least 1 hour or until solid

  6. Remove from freezer about 5 minutes before serving to allow some thaw

  7. Using a sturdy scoop or spoon - mound granita into serving dishes with a trickle of cream - the cream will solidify (like a snowcap on a pink mountain)

  8. Serve immediately

Friday, August 28, 2009

Asian Inspired Eggplant Salad


This is an easy salad that plays very nicely to Asian flavors. The eggplant is baked eggplant is complimented by the sesame dressing.

The recipe calls for Japanese eggplant. This is a different variety of eggplant that most are not used to. It is a skinny, smaller sized eggplant that looks like a purple cucumber. The Japanese eggplant is great for small servings

Japanese eggplant can be purchased at Asian grocers and high-end/specialty gourmet food stores.

Ingredients

  • 5 Japanese eggplants
  • 5 cups salad greens, rinsed and dried
  • 2 garlic cloves, peeled and minced
  • 1⁄4 cup sesame seeds
  • 3 tbsp canola or vegetable oil
  • 2 tbsp soy sauce
  • 2 tbsp Asian sesame oil
  • 2 tbsp extra-virgin olive oil
  • 1 tsp sugar or sugar substitute
  • 1⁄4 tsp hot red pepper sauce
  • Sea salt and freshly ground black pepper to taste

Process

Dressing Preparation

  1. Place sesame seeds in a small dry skillet over medium heat

  2. Toast seeds for 2 minutes or until browned, shaking the pan frequently

  3. Set aside browned seeds to cool

  4. Combine soy sauce, garlic, and sugar

  5. Add sesame oil, olive oil, and hot red to soy mixture

  6. Add pepper sauce to taste

  7. Mix/shake dressing well and set aside

Salad Preparation

  1. Preheat the oven to 400°F

  2. Cut eggplants into 1⁄2-inch slices

  3. Spread vegetable/canola oil on baking sheets lined with foil

  4. Arrange eggplant slices on tray

  5. Sprinkle with salt and pepper

  6. Bake eggplants until soft (15 to 20 mins)

  7. Arrange salad greens on serving plates, and top with warm eggplant slices

  8. Drizzle with dressing and serve immediately

Thursday, August 27, 2009

Arugula Bruschetta with Walnut Pesto


Here is another crowd pleaser. Use as a party appetizer or as a quick meal for yourself when you just don't feel like cooking.

The addition of the sun-dried tomatoes to the pesto adds a great layer of sweetness that is very pleasing and a bit different.

Make sure to make lots of extra pesto. It will keep for about five days in the refrigerator. Use the extra pesto to enhance soups or use over your favorite pasta.

Ingredients

  • 8 baguette slices
  • 1 1⁄2 cups extra virgin olive oil
  • 1 cup walnuts
  • 3⁄4 cup grated Parmigiano-Reggiano cheese
  • 3⁄4 cup sun-dried tomatoes
  • 1⁄2 cup baby arugula leaves
  • 2 tbsp unsalted butter
Process

Pesto Preparation
  1. In a food processor, combine the walnuts, Parmigiano-Reggiano, butter, sun-dried tomatoes, and 3⁄4 cup of the olive oil

  2. Pulse until the sun-dried tomatoes are pureed. Add the remaining oil and process until smooth, about 15 seconds.

  3. Transfer to a bowl and refrigerate until ready to use (Note: there should be at least 1⁄2 inch of olive oil that sits on top of the pesto. If not add more olive oil)

  4. Bring to room temperature and stir thoroughly before serving
Bruschetta Preparation
  1. Cut baguette into 1/2 inch thick slices - cut diagonally

  2. Toast the baguette slices until crisp and lightly browned

  3. Spoon about 2 tbsp of pesto over each baguette slice so that the bread is covered (crust to crust) with a thin layer of pesto
  4. Top with a few arugula leaves and serve immediately

Wednesday, August 26, 2009

Removing The Odor Of Onion From Your Hands And Garlic From Your Breath


George Washington may have proclaimed onions "the most favored food that grows!" but chances are he was not the one doing the chopping.

Beloved on every continent, the onion (and the entire Allium family, which includes leeks, shallots, garlic, and chives) contains a redolent juice that lingers even longer on the fingers than it does on the tongue.

There are several ways to get rid of the smell. Rub your fingers with lemon juice and/or salt, or rub your hands against a stainless-steel bowl or spoon, which alchemizes the odor.

To get rid of onion or garlic on your breath, chew something rich in chlorophyll, like raw parsley (or cilantro, which neutralizes the offending odor), and drink an acidic liquid, such as lemonade or wine.

Tuesday, August 25, 2009

CSA- Share Details: Week #14

FROM THE FARMER:

Hi everyone – if you have been watching the news you know we have braved yet another tornado & straight line winds – we now have plenty of firewood for the winter heating – thank you very much


Boxes today –Corn, cukes, zucs, peppers, eggplant, beans – riding along side – tomatoes & basil – something else I think – but can’ t recall right now & the boxes have left the farm ;-(


Folks should open that basil & let dry –spread it a towel would be good & then refrigerate - we packed it this morning & it is wet with morning dew – so open up right away


Grilled Beets in Rosemary Vinegar

Here is a simple, fun preparation for beets on the grill. Beets grill absolutely great because of their high sugar content. Make sure not to overcook the beets. Additional sweetness is provided as the balsamic vinegar is reduced during cooking.

Herbes de Provence is a dried spice blend essential to French cooking. Herbes de Provence usually includes basil, fennel seed, lavender, marjoram, rosemary, sage, summer savory and thyme. Blends will vary by manufacturer. Herbes de Provence should be available where dried herbs and spices are sold in your local grocer.

Ingredients

  • 3 medium beets, sliced into rounds
  • 1 clove garlic, peeled and crushed
  • 1/3 cup balsamic vinegar
  • 1 tsp chopped fresh rosemary
  • 1/2 tsp herbes de Provence
Process
  1. In a medium bowl, mix balsamic vinegar, rosemary, garlic, and herbes de Provence

  2. Place beets in the mixture, and marinate at least 20 minutes

  3. Set your outdoor grill for high heat, and lightly oil grates

  4. Place the beets and marinade mixture on a piece of foil large enough to wrap all ingredients, and seal tightly

  5. Place the foil packet on the prepared grill, and cook 25 minutes, or until beets are tender

  6. Remove beets from the packet, and place directly on the grill grate for 2 to 5 minutes before serving hot

Monday, August 24, 2009

Chilled Cucumber Soup

If you're looking for some summer soup inspiration...look no further!

This soup is perfect start to a slow dinner on a hot summer night. The cool cucumber lends a refreshing, delicate flavor to this elegant chilled soup.

While many cream based soups get a bad rap for being "unhealthy" (and I won't try to debate that heavy cream is healthy for you), it is a necessary ingredient that provides the silkiness to the soup. Given the small amount of cream per serving - about 1 tbsp - it is not that much of a show stopper.

Ingredients

  • 2 medium cucumbers, peeled and diced
  • 1 medium onion, chopped
  • 1 1/2 cups vegetable stock
  • 5 tbsp heavy cream
  • 2 tbsp olive oil
  • Salt and pepper to taste
  • Fresh mint, for garnish
Process
  1. Add the oil and onion to a large pan and sauté for approximately until onions are softened (about 9 to 12 mins)

  2. Add the cucumber and cook until cucumbers are tender

  3. Transfer the mixture to a blender or food processor and carefully blend until smooth **

  4. Return the pureed mixture to the pot and add the stock and cream

  5. Over medium-high heat, stirring constantly, bring to a boil

  6. Reduce heat and simmer for 5 minutes

  7. Cool to room temperature and then refrigerate until well chilled

  8. To serve, ladle soup into bowls and garnish with fresh mint, if desired

**Caution! Hot liquids create steam which will blow the top off the blender! Be sure to securely hold blender lid down!

Sunday, August 23, 2009

Swiss Chard, Barley and Cannellini Bean Soup

Chard (aka Swiss Chard, Silverbeet, Perpetual Spinach, Spinach Beet, Crab Beet, Seakale Beet and Mangold) is a leafy vegetable. Although the leaves are eaten, it is in the same species as the garden beet which is usually grown for its edible roots. Chard is very popular within Mediterranean cuisine.

The recipe is surprising simple to make. The duo of barley and cannellini beans makes this a hearty soup that can be served as dinner. As a point of measurement, a 19oz can of beans will do the trick for this recipe.

Ingredients

  • 1 bunch Swiss Chard
  • 5 cups water
  • 1 1/2 cup pearl barley
  • 1 1/2 cups canned cannellini beans
  • 1 cup finely chopped onion
  • 1/2 cup finely chopped carrot
  • 1/2 cup celery
  • 1/2 cup barley
  • 1/3 chopped canned plum tomatoes with juice
  • 1/4 cup olive oil
  • Sea salt and fresh ground pepper to taste
Process
  1. Soak Swiss chard in cold water for 10 min - drain and wash again

  2. Cut stalks crosswise into 1/8 inch cuts

  3. Cut leaves into 1/4 inch wide strips

  4. Put olive oil and onion in large pot and cook until golden on medium-high heat

  5. Add carrots and celery and cook for 5 minutes

  6. Stir in tomatoes and cook until all vegetables are softened

  7. Stir in the chard and 1 tsp salt

  8. Cover and cook on very low heat for 40 min

  9. Meanwhile in a saucepan, bring water to a boil

  10. Add barley and simmer over moderately low heat- Until tender, about 35 minutes

  11. Drain and RESERVE cooling water

  12. Add the cooked barley and beans to the chard mixture

  13. Stir well and cook for 2 additional minutes

  14. Stir in the 2 1/2 cups of the barley water

  15. Season with salt and pepper to taste

  16. Ladle into bowls and top with hearty slices of Parmesan cheese

Saturday, August 22, 2009

Feta Stuffed Tomatoes

The combination of feta cheese with fresh tomatoes conjures up a delicious taste of summertime in Greece. With a few simple ingredients, you get a wonderful appetizer for a dinner party or serve as a mid-week dinner entree.

The key to this recipe is to use the ripest, reddest tomatoes available. If your tomatoes aren’t quite ripe (meaning they are a pinkish-orange color instead of bright red), place them in a brown paper bag and keep in a dark place for a day or two to ripen.

Over the years, I have switched to using Panko over traditional bread crumbs. Panko is the Japanese version of bread crumbs. They tend to be lighter, crispier, and crunchier than Western varieties. Panko is excellent for breading, toppings and make an excellent filler. They are available at Asian grocers or can also be found in the baking section of your local food market (or where traditional bread crumbs are stocked).

The recipe as presented is Greek in style. Feel free to experiment with other varieties of cheese and spices to achieve tastes of other cuisines (i.e.: Parmigianino Cheese and Italian spices for an Italian style stuffed tomato).

Ingredients

  • 4 medium-sized ripe tomatoes
  • 1/2 cup finely crumbled feta cheese
  • 1/4 bread crumbs or Panko
  • 3 tbsp. olive oil
  • 2 tbsp. finely chopped scallions
  • 2 tbsp. finely chopped fresh parsley
Process
  1. Preheat oven to 350°F

  2. Carefully cut tops off tomatoes

  3. Using a spoon, carefully scoop out pulp and seeds - save pulp and discard seeds

  4. Coarsely chop the tomato pulp

  5. In a small bowl, combine tomato pulp with scallions, parsley, feta cheese, bread crumbs, and olive oil

  6. Spoon mixture into the hollowed-out tomatoes

  7. Place tomatoes right side up in a small baking pan and bake for 15 minutes

  8. Serve stuffed tomatoes steaming hot

Friday, August 21, 2009

Stuffed Summer Squash


Here is a down and dirty way to stuff summer squash. It is about as simple as simple gets.

I am going to offer this as a set of steps. Use your instincts and tastes for this and you will be good to go. This recipe also works well with zucchini.

Approach:

1. Cut the squash in half and cook in a 350 degree oven until the pulp is soft

2. Scoop out the squash pulp and chop it

3. Cook some garlic and onion in olive oil and flavor with herbs of your choice (i.e. thyme)

4. Remove the garlic-onion mix from heat and mix in the chopped squash pulp

5. Add in some grated cheese of your choice (if desired)

6. Put the mixture back into the emptied squash halves

7. You can bake them as prepared or add additional cheese or bread crumbs as a topping/crust

8. Cook in oven until tops are crisp

The Melon Primer

There are dozens upon dozens of varieties of melon. As we all know, summertime is the best time for melons.

By far, the most popular of the melons are honeydew, cantaloupe and watermelon (a.k.a. The Melon Three).

This article is offered as a quick primer to the more common melons that you might find in the local grocer. Armed with this new found information the less common varieties will be just as appealing as The Melon Three.

Regular Seedless Watermelon

The watermelon, as the name implies, is approximately 90% wa­ter! The most popular of all "melons" is not really a melon at all, but is actually a gourd. It has a smooth exterior rind (green and yellow) and juicy, sweet, usually red interior flesh. In addition to containing vitamin C, watermelons also contain more lycopene than to­matoes, an important antioxidant that helps us fight disease. The watermelon is also the only "melon" that tastes better the colder it is.

Cantaloupe

Another extremely popular melon in the United States, the can­taloupe is actually called a muskmelon. This familiar fruit with orange flesh and netted khaki-colored skin provides the most beta-carotene in the entire melon family, and more vitamin A than any other fruit. Select melons that are slightly golden with a light fragrant smell (an indication of ripeness).

Honeydew

The sweetest of all the melons and averaging five to six pounds, honeydew melons have a creamy yellow rind when ripe and pale green flesh. They are best from June through October, but are available year round.

Crenshaw

These melons can weigh up to ten pounds and deliver a unique sweet and spicy flavor. They are a hybrid between the Casaba and the Persian melon, with yellowish skin and salmon-colored flesh. Peak season for Crenshaw melons is August through September, with the fruit season begin­ning in July and ending in October.

Orange Flesh Melon

This delicious melon is a cross between a Cantaloupe and a Honeydew. It is fairly round, with smooth skin and a creamy white rind. The soft flesh is a rich orange color and has an earthy, almost mango like flavor.

Juan Canary

A football- shaped melon that sports a bright yellow rind, this variety first became popular on the Canary Islands, hence the name. Canary melons have white flesh with a crisp texture; sometimes a little pink color can be seen near the seeds. This melon is particularly fragrant.

Casaba

Unlike the other melons, Casaba melons do not have an aroma. This is a large melon that is pale yellow when ripe and has white flesh with a sweet taste. This melon peaks in the fall, but starts showing up in markets in July and can sometimes be found through December.

Santa Claus Melon

Also known as the Christmas Melon, the Santa Claus Melon is shaped like a small watermelon, and sports a rind with blotches of dark green and yellow or light green. It has pale green flesh, which is very sweet and very juicy, and tastes a little like a Honeydew melon.

Seedless Mini Watermelon

Seedless mini watermelons are about the size of a cantaloupe or smaller, making them perfect for two people. They fit easily into a refrigerator. These miniature watermelons are very sweet from the first bite all the way to the very thin rind. The flesh contains an abun­dance of juice and can vary in color from deep pink to the usual deep red. (More about this melon on this month's front cover.)

Tuscan-Style Cantaloupe

The Tuscan melon is a smallish, round to slightly oval melon, and like the mini water­melon, it is the perfect serving size for two people. Tuscan melons are very sweet, with a rich honey like finish, usually tasting considerably sweeter than regular cantaloupe. They have orange flesh and are very fragrant. This melon variety is easily recognizable by its tan skin (like a cantaloupe) and prominent exterior striations encircling the melon that change from dark green to a golden-cream color as they ripen.

Spices and Herbs - What is the Difference?


Herbs are the fragrant leaves of plants that do not have woody stems.

Spices are the barks, berries, roots, fruits, and stems of various plants, trees, and vines.

In general, the more vibrant an herb or spice's color, the more of its flavor has been retained.

Fresh herbs are usually preferable to dry.

Freshly grated or ground spices are more potent than pre-ground.

Thursday, August 20, 2009

Grilled Peaches with A Fresh Cherry Sauce


I love the creative twist of this grilled dessert. This recipe is a play on the classic Peach Melba.

The grilling process gives an exotic taste to grilled fruits. Peaches take wonderfully to the grill, and their luscious sweetness marries perfectly with a bit of smoke.

The recipe takes advantage of the best that summer fruits have to offer with surprising flavors supported by the red wine, balsamic and cherry liqueur.

Ingredients

  • 4 medium peaches
  • 4 cookies
  • 1 lb dark cherries, pitted
  • 1 cup vanilla ice cream
  • 1/2 cup dry red wine
  • 2 tbsp unsalted butter
  • 2 tbsp brown sugar
  • 1 tbsp sugar
  • 1 tsp balsamic vinegar
  • 1 tsp kirsch (cherry liqueur)
Process

Cherry Sauce:
  1. In a sauté pan, over medium-high heat, combine the cherries, sugar, red wine, and balsamic vinegar

  2. Bring to a simmer and cook, stirring occasionally, until the fruit is soft, 6 to 8 minutes

  3. Transfer the mixture to a food processor and puree until completely smooth

  4. Return the mixture to the sauté pan over medium-high heat

  5. Carefully add the kirsch and simmer until reduced to about 1/4cup
Peach Preparation
  1. Cut the peaches in half and remove the pits and place in a bowl

  2. In a small saucepan, over low heat, melt the butter and brown sugar

  3. Coat the peaches with the butter mixture

  4. Grill directly over medium-heat until grill marks are clearly visible and the peaches are soft (about 10 to 12 minutes) - turning peaches once on the grill

  5. While the peaches are still warm, layer each serving glass with 2 peach halves, 1 scoop of ice cream, and 1 tablespoon of cherry sauce

  6. Tuck a cookie into each glass and serve immediately

Wednesday, August 19, 2009

Apple Fennel Slaw

Who said that slaw has to be only made with cabbage and mayo? In fact, with rare exception, I usually avoid traditional slaw like the plague! I have food service nightmares of mayo-based coleslaw sitting in big tubs roasting in the sun for hours. Only for... OK...OK... I am going to stop myself there. Therapy is next week!

Let's face it, slaw can really be anything that can be thinly sliced. In the case of this recipe, a duo of apples are married with fennel for an outstanding side dish that will stand up to just about any BBQ. It is a delicious twist on old school coleslaw.

This recipe calls for cardamom which is a member of the ginger family. It is used as a spice in cooking and can usually be found in the baking or spice section of your grocer. It is a bit more expensive that other spices but a vital part of the recipe that should not be omitted.

The sweet and tart of the apple duo is offset by the slight licorice flavor of the fennel. The addition of the vinegar and lime give it the tang. The cardamom, scallion and cilantro provide additional layers of flavor that results in a crunchy, complex and light side dish that is very pleasing.

Ingredients

Slaw

  • 1 bulb fennel-stems and leaves removed
  • 2 Granny Smith apples
  • 2 Red Delicious apples
Dressing
  • 2 Tbsp Olive oil
  • 1 Tbsp fresh lime juice
  • 1 Tbsp chopped cilantro
  • 1 Tbsp chopped scallion
  • 1 Tbsp rice vinegar*
  • 1-2 Tbsp sugar or sugar substitute
  • 1/2 tsp ground cardamom**
  • Sea salt and fresh ground pepper to taste
Process
  1. Core the apples - DO NOT peel the skin

  2. Julienne or cut into thin matchsticks the fennel and apples

  3. Combine all dressing ingredients and adjust seasoning with salt, pepper and sugar to taste

  4. Toss fennel and apples with dressing

  5. Marinate in the refrigerator for at least 2 hours

  6. Toss before serving

* Cider vinegar can be used in place of the rice vinegar

** While not a complete or adequate substitute, you can use equal parts ground nutmeg and cinnamon OR equal parts ground cloves and cinnamon in an emergency

Tuesday, August 18, 2009

Keeping Salad Greens Fresh?


So... you buy a head of lettuce and stick it in the fridge. Few days later, you got an biology experiment growing in the bottom of your refrigerator crisper.

The reality... it's easier to avoid this problem than prevent it. Stating the obvious: eat your salad greens within several days of purchase.

If this isn't possible to consume it all in time then:

1. Wash the greens and dry them very well with a salad spinner or towels
2. Then wrap them in paper towels and place in a plastic bag in which you've made several holes.

The purpose of the hole in the bag is to assure that the greens are well ventilated. This process should provide you with seven to ten days of refrigerator life.

Iceberg lettuce should be stored intact. When ready to use, slam the stem end of the lettuce on a counter and the core should slip right out. If you want to prepare iceberg ahead of time, store as above, either in leaves or torn.

Torn is the way to go.

Chopping lettuce is a No-No of Universal Proportions.

Unless you're making tacos or slaw, tear lettuce into bite-size pieces. The one exception is if you are preparing a lettuce wedge to be drowned in creamy dressing.

So there you have it! Eat or store (as noted above)

Monday, August 17, 2009

CSA Tasting & Cooking Demo - recap


Last week we had our first CSA event, and a successful one at that. Chef Mike and his sous chef, Jason (not a CSA member, just a really good friend) donated their time and enthusiasm to create a very enjoyable night; sharing with us a delicious menu, many cooking techniques, and lots of food information and tips.


The menu began with a Watermelon and Cucumber Tonic that paired quite nicely with the gin so generously supplied by Chef Mike. Even virgin, it was refreshing and minty.


Next we munched on a Peach and Cucumber Salsa with chips using the juicy peaches from our farm.


A fancy looking, but extremely easy to prepare Beet Carpaccio followed. A surprise hit of the evening. Next, Chef Mike prepared a Napa Asian Salad that we ate hot, but would be delicious as a cold salad as well. This one packed a bit of heat...maybe the chili paste was a bit too much for some of us (but others loved the heat), but chef Mike told us how tone it down. We ended the tasting with Chef Mike's No Cook Summer Sauce w/ Whole Wheat Pasta. A nice, hearty summer dish and a great way to use all of the CSA bounty.

Thank you Rachel and Jess for letting us use your kitchen.

Our intent was to offer an intimate, interactive event - which is why we had such a limited number of spaces available. However, from the immediate response and subsequent Evite rsvp's and notes, there is much interest in this type of event and we are already trying to secure another night. If you would like to volunteer your kitchen, we need a large enough space for ~15 people to be able to view an area/counter big enough to prepare all the dishes. email if you want to discuss this further. Also, Chef Mike and Jason are available for personal events and custom in-home classes. Send an email if you are interested or want more information.

CSA Details- Week #13

This weeks share: peaches, purple cabbage, peppers, white eggplant, cucumbers, zucchini, tomatoes, green beans, corn

Thank you member Gail I. for sharing your pears with us all!

Please remember...if you know you will not be picking up your share and are donating it to the food bank, please let us know before hand so our volunteers do not have to wait around for no-shows. THANK YOU IN ADVANCE

Recipes from CSA Tasting & Cooking Demo with Chef Mike

Watermelon and Cucumber Tonic

This recipe is an adaptation of the classic gin and tonic with refreshing overtones provided by the watermelon and cucumber. The drink best serves with premium gin and tonic as ingredients. For those that are not fans of gin, the drink is equally delicious non-alcoholic. Recipe can be made up to one day in advance - store in refrigerator until serving. The recipe was originally featured in Cooking Light Magazine.

Ingredients

  • 6 cups cubed seeded watermelon, divided
  • 3 cups English cucumber, peeled, sliced, and divided
  • 1/2 cups tonic water, chilled
  • 1/4 cup mint leaves, divided
  • 1/4 cup fresh lemon juice, divided
  • 1 1/4 cups gin
Process
  1. Combine half each of the watermelon, mint, juice, and cucumber in a blender or food processor; process until smooth.

  2. Strain mixture with a colander lined with 4 layers of cheesecloth (allow the cloth to extend over the edges)- reserve the juice mixture.

  3. Gather the edges of the cheesecloth together. Holding over colander, squeeze to release the remaining juice mixture and discard solids.

  4. Repeat the procedure with the remaining watermelon, mint, juice, and cucumber.

  5. Combine 2 1/2 cups juice mixture, tonic water, and gin, stirring well to combine. Best served over ice

Beet Carpaccio


A quick and robust appetizer featuring a array of multi colored beets. The beets are arranged carpaccio style or paper thin and served on a toasty whole grain baguette with a sprinkle of herbs and blue cheese. Experiment with different varieties of beets such as pink-and-white-striped Chioggia, electric-yellow Golden Detroit and ruby-red Moneta. The recipe was originally featured in Eating Well Magazine.

Ingredients
  • 3 medium beets
  • 12 thick slices whole grain baguette
  • 4 tsp extra-virgin olive oil
  • ¼ cup crumbled blue cheese (at room temp)
  • 1 tsp chopped fresh herbs
  • Sea salt and freshly ground pepper to taste
Process
  1. Place beets in a large saucepan and add enough water to cover by at least 2 inches. Bring to a boil; reduce heat to maintain a gentle simmer and cook until a fork inserted into a beet comes out with little resistance, about 40 minutes. (Overcooking will make the beets more difficult to thinly slice.) Drain and let stand until cool enough to handle.

  2. While the beets cool, brush baguette slices with 2 teaspoons oil. To toast, preheat oven to 350°F. Arrange the slices in a single layer on a large baking sheet and bake, turning once halfway through, until toasted but not browned, about 14 minutes. (Alternatively, grill the bread over medium heat, turning once, until lightly toasted, 2 to 3 minutes.)

  3. Trim both ends of the beets and rub off the skins with your fingers. Slice as thinly as possible, using a mandolin or sharp knife. Arrange the beet slices on a large platter or on 6 salad plates. Sprinkle blue cheese, herbs, salt and pepper over the beets and drizzle with the remaining 2 teaspoons oil. Serve with the toasted baguette.

Cucumber and Peach Salsa

This is a great summer salsa that is refreshing on those hot days. It perfectly pairs with just about any grilled white flaky fish and some of the more mild steak fish.

If possible, aim to use peaches that are very ripe and sweet. Also, I prefer a more mild onion for this salsa as to not over take the flavors of the peach and cucumber. Remove the jalapeno peppers and you got a kid friendly salsa. Use on fish tacos and the kids will be begging for more.

Allow up to 4 hours for the flavors to combine. Place in the refrigerator in an air tight container until use. This is a salsa that is best served a little colder than room temperature.

Ingredients
  • 3 ripe peaches
  • 1 cucumber
  • 1/2 sweet Vidalia onion
  • 1 jalapeno pepper
  • 1 tbsp mint
  • 1 tbsp basil
  • Juice of 1 lime
  • Salt to taste
Process
  1. Pit and chop the peaches

  2. Seed and chop the cucumbers

  3. Chop the onion

  4. Remove seeds and ribs of the jalapeno and finely chop

  5. Finely chop the mint and basil

  6. Combine all ingredients in a large bowl

No Cook Summer Sauce w/ Whole Wheat Pasta

Here is a great recipe for those sweltering days of summer. The key to this recipe is great tomatoes, the closer to fresh off the vine, the better.

Additionally, this recipe is highly flexible to the ingredients you are using. You can adjust as needed based on the ripeness of the produce and herbs you are working with. For example, you may require less sugar based on the sweetness of the tomatoes.

Ingredients
  • Whole wheat pasta of choice
  • 3 pounds of ripe tomatoes
  • 2 cloves of garlic, minced
  • Fresh basil or oregano leaves (a couple of tbsp to taste)
  • Freshly grated Parmesan cheese (1/2 cup to 1 cup)
  • Extra virgin olive oil (about ¼ cup)
  • 1 cup toasted pine nuts
  • 1/2 cup red onion or scallion greens, minced
  • Sugar or Splenda, sea salt and fresh pepper to taste
Process
  1. Cook pasta to box directions

  2. Toast pine nuts until golden brown and aromatic

  3. Chop tomatoes into 1/3 inch dices

  4. Chop the basil/oregano

  5. Take 1/4 cup of toasted pine nuts, place in small plastic bag and smash into meal

  6. In a medium bowl, combine oil, garlic and ground pine

  7. Mix in tomatoes, onion, herbs, and cheese

  8. Add a pinch or two of sugar to balance tomato acidity

  9. Add salt and pepper to taste

  10. Adjust cheese and herbs to desired taste

  11. Stir in remaining toasted pine nuts

  12. Plate pasta in serving bowls and ladle sauce over pasta and garnish with a sprig of oregano or a few basil leaves

Asian Napa Salad

This might be one of my favorite recipes for fresh Napa cabbage. It is a wonderful alternative to your leafy green salad. I usually make this when I am looking for the salad to be the meal. The recipe is very easy to prepare. There are two stages to this recipe - dressing and salad prep. If you are pressed for time, you can make the dressing up to a day in advance.

I should caution you that the dressing does have some kick with the garlic, ginger and chili paste. If you want to neuter the heat, I would suggest adding less of the chili-garlic sauce at first and increase the amount to a preferred heat level. Remember that it will take on additional heat, as the flavors meld together with time.

When serving this for guests, I do like to plate in a large shallow serving plate and will use a combination of both black and white toasted sesame seeds. I also garnish with additional thinly sliced scallion greens for color. Black sesame seeds are available at your local Asian grocer.

Ingredients

Dressing
  • 3/4 cups reduced-sodium chicken broth/stock*
  • 1/4 cups reduced-sodium soy sauce
  • 2 cloves garlic - minced
  • 3 tbsp olive oil
  • 3 tbsp rice-wine vinegar
  • 1 1/2 tbsp brown sugar or Splenda brown sugar
  • 1 tbsp fresh ginger - minced
  • 1 tbsp tahini paste
  • 1 1/2 tsp sesame oil
  • 1 1/2 tsp chile-garlic sauce
Salad
  • 8 cups shredded Napa cabbage
  • 3 1/2 cups shredded poached chicken (cooked)**
  • 5 radishes, sliced
  • 1/2 cups grated carrots
  • 1/2 cups chopped scallions
  • 3 to 4 tbsp sesame seeds
Process

Dressing
  1. In a small container add soy sauce, vinegar, brown sugar, sesame oil and chile-garlic sauce and stir to blend

  2. Add oil to small saucepan over medium-high heat

  3. When oil is hot add garlic and ginger and cook until fragrant (about 1 to 2 mins) - stir constantly

  4. When fragrant, add soy sauce mixture to the pan and bring to simmer

  5. Carefully whisk into saucepan, broth and tahini

  6. Cook until slightly reduced (about 3 to 5 mins)

  7. Remove dressing from heat and allow to cool
Salad
  1. Toast sesame seeds in a dry skillet on medium heat until golden brown and aromatic (about 2-3 mins)

  2. Remove sesame seeds from heat and allow to cool

  3. In a large serving bowl, combine carrots, cabbage, chicken, radishes and scallions

  4. Stir dressing to recombine and drizzle over salad - toss to coat

  5. Top with sesame seeds and serve

* The poaching liquid from the chicken can also be used in substitute for the chicken broth or stock

** Should be around 1 1/2 pounds of boneless and skinless chicken breast

One Straw Farm’s Stuffed Bell Peppers

This is a vegetarian adaptation of One Straw Farm's Stuffed Bell Pepper recipe.

For those of you that are not familiar with One Straw Farm, they are the largest organic vegetable farm in Maryland. The farm was founded in White Hall, Maryland in 1985 by Drew and Joan Norman.

From its inception, One Straw has been a pioneer in the local revolution for organic, sustainable solutions and a leader in the local CSA scene.

You can find them on the web at www.onestrawfarm.com.

Ingredients

  • 3 large bell peppers of any color
  • 2 tablespoons olive oil
  • 1 small onion, finely diced
  • 2 tablespoons garlic, finely chopped
  • 2 small or 1 large zucchini, diced small
  • 3 tomatoes, cored, lightly seeded and chopped
  • ¼ cup chopped basil
  • Salt and pepper
  • 3 cups prepared bulgur*
  • 8 ounces cheese, crumbled (feta or goat)**
Process
  1. Preheat oven to 350 degrees
  2. Cut bell peppers in half length-wise - remove seeds and ribs
  3. Place the peppers, hollow side up, into a lightly greased baking dish
  4. In a large skillet, heat the olive oil - when hot, add the onion and garlic, and sauté for about 4 to 5 minutes, or until onion is soft
  5. Add the zucchini and sauté for about 3 minutes longer
  6. Add the tomatoes and basil, and simmer for 5 minutes
  7. Remove from heat and set aside to slightly cool
  8. When the stuffing has cooled, fold in the bulgur and about half of the cheese
  9. Season with salt and pepper to taste
  10. Stuff the peppers generously with the mixture and top with the remaining cheese
  11. Cover the baking dish with foil and bake for about 20 minutes in oven
  12. Remove foil and bake for an additional 10 to 15 minutes or until nicely browned

Notes:

* Couscous (basic or Israeli) or quinoa could be substituted for the bulgar that was originally called for

** The recipe originally called for Feta cheese, however, free free to experiment with other cheeses such as goat, blue, mozzarella

Sunday, August 16, 2009

Grilled Corn - The How To?

This be the season for Grilled Corn!

It's part of the summer bounty ... and a rich bounty indeed.

While most opt to boil corn, I would like to urge you to consider grilling corn as an alternative. It is very easy and adds another dimension to the richness of fresh corn.

Below is a quick primer on a few approaches to proper grilling of corn on the cob.

Option 1: Indirect Method

This method will roast the corn without infusing too much smoky flavor

  • Husk the corn and wrap individually in foil
  • Place on the grill for about 12 minutes
  • Turn a few times to make sure all sides get cooked
Option 2: Direct Method

This method cooks the corn directly on the grilling surface where the corn will gather a roasted smoky flavor.
  • Husk the corn
  • Rub the ears lightly with butter or olive oil
  • Place on the grill for about 7 to 10 minutes
  • Turn often until they begin to brown
Bonus: Lime Butter Sauce

Ditch the basic butter and replace it with this great lime-flavored compound butter.

This simple butter enhancement elevates common corn on the cob to a whole different dimension. The butter can be made up to two days in advance and stored in the refrigerator. Just melt butter and brush over cobs before grilling.

Ingredients
  • 1 1/2 tablespoons butter, melted
  • 1 1/2 tablespoons fresh lime juice
  • 1/4 teaspoon grated lime rind
  • 1/4 teaspoon salt
  • 1/4 teaspoon ground red pepper
Process

Combine butter, rind, juice, salt, and pepper in a small bowl

Store up to two days in refrigerator

Friday, August 14, 2009

Peach Julip

I love those summer evenings when it is just cool enough to have dinner on the deck with the kids. It is during these moments that I am always looking for something cool and refreshing of an alcoholic variety.

Not sure if that is subconsciously kid induced - but we can figure that out later.

With peach season upon us, this is a great recipe to capture the flavors of the moment. The peach juice in this recipe can be either store bought or freshly blended. Omit the bourbon and you got a great drink to share with the kiddies.

Ingredients:

  • 1 (12 oz) can club soda
  • 1 1/2 cups peach juice
  • 1/2 cup bourbon
  • 1/2 cup fresh mint leaves, plus sprigs for garnish
  • 2 tsp sugar or Splenda
  • crushed ice
Directions

1. In a medium bowl or pitcher, combine mint and sugar

2. With a wooden spoon, mash leaves until bruised

3. Stir in peach juice, club soda and bourbon

4. Serve over crushed ice; garnish with more mint

Seasons Best Bounty Cocktail

This is a drink best suited for the cooler months when the fresh fruits are less available. However, I cannot help posting this recipe now. So many of the ingredients called for in this recipe are fresh from the farm offering even more superior flavor to the drink.

As presented below, this is a super healthy non-alcoholic beverage. Make it as an on-the-go drink in the morning. It also is a great alternative cocktail drink that presents well in a chilled martini glass with an olive for a garnish.

One note, this is really a juicer recipe. You can make it in the blender with good results but this recipe could persuade you to finally go out and get that juicer.

Ingredients:

  • 2 tomatoes
  • 3 carrots
  • 3 stalks of celery
  • 1 cucumber
  • 1 handful parsley (with stems)
  • 1 red pepper
  • Salt to taste (optional)
Process:
  1. Juice all ingredients

  2. Add salt if desired

  3. Serve in a chilled glass

Thursday, August 13, 2009

Guac That Rocks! Guacamole Two Ways - Part 2 - Caribbean Guacamole


This is the second part of a two part series. Please see yesterday for first part of series.

This is a zesty and fun guacamole. The flavors derived from the ingredients are nothing short of pure Caribbean. If you are looking to sport an Island Style menu make sure to include this in your menu planning. Pairs well with jerk chicken, grilled fish or just serve with tortilla chips or plantain chips.

Ingredients:

  • 1 ripe avocado, peeled, seeded and diced (California Hass preferred)
  • 1 ripe mango, peeled, seeded and diced
  • 1 ripe papaya, peeled, seeded and diced
  • 1 jalapeno pepper, peeled, seeded and finely diced
  • 1 cup red onion, diced
  • 2 tbsp lime juice (fresh preferred)
  • 2 tbsp cilantro, chopped
  • ¼ tsp lime zest (green part of peel)
  • ¼ tsp salt
  • ½ tsp white pepper (or black pepper in a pinch)
  • ½ tsp Pickapeppa sauce or hot sauce
Process:

Combine all ingredients in a food processor and pulse until slightly chunky. Do not over process. Cover and refrigerate for 2 hours or more to allow flavors to set. Garnish with mango/papaya slices or cilantro.

Wednesday, August 12, 2009

Guac That Rocks! Guacamole Two Ways - Part I - Traditional Mexican Guacamole

When I think about exotic places, I think of being on a secluded beach in Mexico… white sandy beaches, clear water and blue skies. As I chill out on a beach chair with an ice cold Corona with lime (in hand) and a hearty bowl of fresh guac and chips to my other side, I contemplate nothing but the moment!

Let me say right off the bat, if your impression of guacamole is the pre-made stuff from the grocery store, then you have not had guacamole. It would be like saying that fast food is fine dining (which we all know is not the case).

In general, avocado is a simple fruit (not vegetable) to work with. While sometimes getting the bum wrap for being high in fat, you might want to re-consider what you think about avacados. They are good sources for Lutein, Vitamin E, Glutathione, Beta-sitosterol, Monounsaturated fats, Folate and Potassium. Check out the Avocado Grower Board for more good stuff on avocados.

The trick to making nice looking guacamole is to introduce an acid, either lemon or lime, to stop the avocado “meat” from oxidizing and turning brown. Oxidation doesn’t affect the taste, but does impact its look, and since you eat with your eyes first, appearance is very important.

I offer you two preparations for guacamole. While my preference is towards chunky or rustic style, if your liking is towards a smoother blend, don’t let me stop you! You can prepare guacamole in a food processor or blender. If you want to go rustic, a fork will do the job and save you clean up time!

Ingredients:

  • 1 ripe Avocados, peeled and seeded (California Hass preferred)
  • ½ cup onion diced (Vidalia onion preferred)
  • ¼ cup cilantro, finely chopped
  • 1 tsp garlic, minced (or more to taste)
  • 1 tsp hot sauce (or more to taste)
  • 1 juice of one lime (or lemon)
  • Salt and pepper to taste
Process:
  1. Seed and peel avocado and cut (or process)

  2. In a medium bowl combine all ingredients and fork mash

  3. Cover and let sit in refrigerator for at least 2 hours to allow flavors to set

  4. Garnish with chopped tomato, chopper jalapeno pepper or cilantro

Note - while it is not necessary, If using food processor or blender, combine all ingredients and pulse until slightly chunky. Do not puree.

Tuesday, August 11, 2009

Tamarind Tequila Glaze for Roasted or Grilled Chicken

Little known fact, although tequila is much more Mexican than Caribbean, the agave cactus that is used for making tequila has made its way to the Caribbean. All over the hillsides of the Caribbean islands you will find the agave cactus.

Tamarind is a sharp flavored fruit. You can get tamarind juice concentrate in the ethnic section of your local grocery store or at your local Caribbean or Middle East grocery or purchase online.

Ingredients:

  • ½ cup tequila
  • ¼ cup tamarind juice concentrate
  • ¼ cup lime juice (fresh preferred)
  • 1 serrano or jalepeno pepper
Process:
  1. Seed and remove ribs from peppers and finely mince

  2. Combine all ingredients in bowl

  3. Marinade meat overnight before roasting or grilling

  4. If roasting, you can mix pan drippings with arrowroot, corn starch or flour to desired thickness to use as a sauce or gravy

Monday, August 10, 2009

Chile-Citrus Compound Butter


In short, compound butters are nothing more than softened butter mixed with aromatics and seasonings. You form the ingredients into a “log” that gets frozen or chilled. When you need some, slice with a heated knife and you have insta-sauce!

Compound butters are especially good on vegetables, breads, fish, chicken and beef. I am particular to compound butters because you can make them in advance and use them as you needed right out of the freezer with no fuss. Nothing fancy nothing complicated, just slice and dress the meal! With this recipe we see those dominant island flavors of chili and lime married with cumin and hot pepper to provide that intense, but subtle, island taste.

If you are looking to change it up a bit, feel free to substitute lemon zest, orange zest or grapefruit zest for the lime zest noted in this recipe. This particular recipe is great with grilled fish steaks or chicken breast or any plain vegetable grilled. Also do not forget a nice slather on fresh bread or bagel!

Ingredients:
8 tbsp softened (not melted) unsalted butter
2 tbsp lime zest (fine grating)
1 tsp cumin
1 jalapeno pepper
Process:
  1. Remove the seeds and membrane from the jalapeno and finely dice the pepper flesh

  2. Combine all ingredients

  3. For long term use, form into a log with plastic wrap and freeze. Use a heated knife to cut portions as needed.

The Sweet Killer Topping: Balsamic Onions

For most people raw onions are just plain offensive. Grilled onions are better. As you heat the onion, the sugars caramelize making the onions sweeter. Add balsamic vinegar to the sweetened onions and you have a delicious mixture.

I discovered balsamic onions not too long ago as a topping for homemade mashed potatoes. This was one of those cooking experiments that I wasn’t sure how my guests would take to. Well it was a hit! People who would normally avoid onions were coming back for seconds!

I quickly discovered that balsamic onions were another great topping for that "Cheeseburger in Paradise" as Jimmy Buffett likes to sing about! So next time you're making burgers, keep this recipe close by.

You can also make this recipe a day or two in advance. If you make it in advance, allow it to come to room temperature or quickly reheat in microwave.

Ingredients:

  • 4 large red onions
  • 3 tbsp oil (olive or canola)
  • 2 tbsp balsamic vinegar
  • ½ tsp salt
  • ½ tsp pepper
Process:

1) line baking sheet with foil and spray with non-stick spray

2) Cut onion into slices

3) Mix oil, vinegar, salt and pepper

4) In a large bowl mix onions with vinegar mixture to coat

5) Place coated onion on baking sheet

6) Place onion in oven on high broil until onions are tender - stirring occasionally

As an alternative, you can also grill the onions on the sheet in the grill on med-high heat for about 7 to 10 minutes until onions are tender, stirring occasionally.

Saturday, August 8, 2009

St. Jimmy's Tropical Paradise Salsa


It is with great pleasure that we end Salsa Week with an award winning Salsa.

A few years back this recipe prepared by yours truly took first place in the DC 101 Chili Cook-off in the salsa category. Shocked does not even begin to explain the news of winning.

I thought for sure I was dead in the water against all the other well prepared tomato-based salsas. Given that I did not bribe the judges, it was a fantastic surprise to have taken first place.

If you have not figured it out by now, I am an Island Guy at heart. This recipe was inspired by the sweet warmth that life in the Caribbean offers. It was my way of getting back there even for just a short moment in time.

Below is the full recipe as it was presented at the competition a few years ago with the narrative.

Thanks for being part of Salsa week and Bon Appetite... Chef Mike

--------------------------------------

St. Jimmy's Tropical Paradise Salsa

From pirates to smugglers, from the super wealthy to the occasional tourist, the islands have a beauty and charm that touches our deepest core. Whether it is the clear waters, slow island time, secluded white beaches, or the soft cloud painted sky - the island life moves us and challenges us to rethink ourselves.

Inspired by the magic and mystic of island life, St. Jimmy's Tropical Paradise Salsa is a robust, yet simple, summertime salsa. Everything from the complex flavors to its light color to its soft tropical texture should muster an island festival in your mouth.

St. Jimmy's Tropical Paradise Salsa is an excellent compliment to any grilled meats or fish. You can also use it as a dip, condiment or after dinner palate pleaser.

Ingredients:

  • 2 tablespoons fresh lime juice
  • 3 tablespoons white rum
  • 1/4 cup brown sugar (firmly packed)
  • 1 cup fresh mango (peeled and diced)
  • 1 cup fresh guava (peeled and diced)**
  • 4 cups fresh pineapple (cored and diced)
  • 1 teaspoon serrano chili (seeded and minced)
Process:
  1. In a large bowl, combine fresh lime juice, white rum and brown sugar - stir well

  2. Add mango, guava, pineapple and chili and toss to coat

  3. Allow to chill at least 3 hours

**Note: Carambola (a.k.a. star fruit) can be substituted for guava if desired.

Friday, August 7, 2009

Cucumber and Peach Salsa

This is a great summer salsa that is refreshing on those hot days. It perfectly pairs with just about any grilled white flaky fish and some of the more mild steak fish.

If possible, aim to use peaches that are very ripe and sweet. The soft sweet of the peach plays very nicely with the refreshing wet crunch of the cucumber in this salsa.

I prefer a more mild onion for this salsa as to not over take the flavors of the peach and cucumber.

Remove the jalapeno peppers and you got a kid friendly salsa. Use on fish tacos and the kids will be begging for more.

Allow up to 4 hours for the flavors to combine. Place in the refrigerator in an air tight container until use. This is a salsa that is best served a little colder than room temperature.

Ingredients:

  • 3 ripe peaches
  • 1 cucumber
  • 1/2 sweet Vidalia onion
  • 1 jalapeno pepper
  • 1 tbsp mint
  • 1 tbsp basil
  • Juice of 1 lime
  • Salt to taste
Process:
  • Pit and chop the peaches

  • Seed and chop the cucumbers

  • Chop the onion

  • Remove seeds and ribs of the jalapeno and finely chop

  • Finely chop the mint and basil

  • Combine all ingredients in a large bowl

Grilled Red Pepper Salsa

The charring and roasting of the red pepper in this recipe holds up very well to grilled red meats. It is an excellent compliment to grilled steak or as a condiment for burgers.

While the original recipe called for habernero or Scotch bonnet chiles, I tend to think that they are too hot for the average person. In this adaptation, I suggest replacing them with serano or jalapeno peppers. If you are a chilehead - go for the Habs!

Also note that the recipe calls for flat leaf parsley over curly parley. My preference is the flat leaf for its flavor and texture in this salsa.

Ingredients:

  • 6 red bell peppers
  • 1 to 2 Serrano or jalapeno pepper , seeded and minced
  • 1 clove garlic - finely chopped
  • 3 tbsp fresh lemon juice
  • 2 tbsp olive oil
  • 2 tbsp fresh flat leaf parsley - coarsely chopped
  • 3/4 tsp salt
  • 1/2 tsp fresh black pepper
Process:
  1. Prepare grill for direct-heat cooking over medium-hot heat

  2. Oil the grill rack and grill bell peppers (covered only if using a gas grill) - turning occasionally until the peppers are slightly softened and charred (about 15 to 20 mins)

  3. Transfer bell peppers to a large bowl and cover tightly with plastic wrap - let stand 20 minutes

  4. When peppers have cool enough to handle - peel peppers, discarding stems and seeds, and cut lengthwise into thin strips or other desired cut

  5. Toss with remaining salsa ingredients

Cranberry-Avocado Salsa

This is my turkey salsa! Individually, cranberries and avocado pair wonderfully with turkey. Combined and you've got magic on the plate with a hint of Thanksgiving. Because of the seasonal access to fresh cranberries, frozen can be used as a substitute.

It makes for a great spread for a fresh turkey sandwich or as a base for turkey salad. Also works well with chicken, light white flakey fishes and chips.

The recipe is best made a day in advanced allowing the flavors to set. Store in airtight container in the refrigerator. Allow at least an hour for the flavors to blend.

Ingredients:

  • 2 ripe avocados
  • 1 yellow bell pepper
  • 1 medium jalapeno pepper
  • 1 12-ounce bag fresh or 3 cups of frozen cranberries
  • 1/2 cup sugar
  • 1/4 cup orange juice
  • 1/4 cup chopped fresh cilantro
  • 1 tbsp grated orange peel
Process:
  1. Seed, rib and dice the jalapeno pepper

  2. Half, pit, peel and dice the avocado

  3. Char the bell pepper over gas flame or in broiler until blackened on all sides

  4. After removing the bell pepper from heat enclose in paper bag for 10 minutes

  5. Peel, seed, and dice the bell pepper

  6. Combine cranberries, sugar, and orange juice in processor - pulse to coarsely chop cranberries

  7. Transfer to large bowl and add bell pepper, jalapeno, and orange peel

  8. Stir avocados and cilantro into salsa

  9. Season to taste with salt and pepper

CSA Food Project - A Experiment in Sustainable Eating   © 2008. Template Recipes by Emporium Digital

TOP  

/* ************ Google Analytics ************ */