The CSA Food Project

The CSA Food Project

Friday, July 31, 2009

Summer Potion # 9 - Herbal Sun Tea

One non-alcoholic beverage that I love in the summer is iced tea. I am a true Northerner in that I like my tea unsweetened....the brisker the better.

Nothing against you Southerners with your sweet tea. I just like to taste my tea without an overwhelming wave of sweet!

This is a very direct recipe calling for a tea source, an aromatic/flavor enhancer and a sweetener. Recipe should yield about two quarts of tea.

All items in this recipe can be purchased at the local grocer. A few notes:

  • You will find cheesecloth most likely in the baking or cooking utensils section

  • While agave syrup is not necessary, if you choose to purchase it will most likely be with other sweeteners

  • The Rooibos tea can be purchased where bulk teas are sold or if you need to you can cut open a few Rooibos tea bags from boxed tea - also sold at your local grocer with boxed teas
The recipe that follows is a great sun tea that allows you to harness the power of the sun to help brew the tea. The five minutes of effort will be well worth the hours of enjoyment at the end product!

Ingredients:
  • 2 quarts cold water
  • 2 tbsp loose Rooibos tea
  • 2 tbsp dried mint
  • Agave syrup, honey, sugar or Splenda
Process:
  1. Place tea and on a square piece of cheesecloth

  2. Tie the cheese cloth into a bundle and tie off with kitchen twine

  3. Place tea bundle in a large glass container and add water

  4. Cover and allow tea to steep in direct sunlight for 2 hours or more

  5. When fully steeped, strain tea and discard solids

  6. Stir in sweetener of choice until fully dissolved - sweeten to taste

  7. Serve tea immediately after sweetening or refrigerate up to 3 days

Thursday, July 30, 2009

Garlic Scape Pesto

For all you garlic scape fans (old and new) here is a recipe that I have seen on other blogs and articles in cyberspace. It's an intriguing recipe that leaves a fair amount of room for creativity.

The substitution of garlic scape for garlic that is traditionally used in pesto, leads to a much milder and less pungent pesto. Make no mistakes, the pesto still has body but in a more gentle way. Use this variation as you would any other pesto on proteins or pasta. This recipe will keep up to one week in the refrigerator in an air-tight container.

Ingredients:

  • 1 cup garlic scapes (about 8 or 9 scapes),
  • 1/3 cup walnuts or pine nuts
  • 3/4 cup olive oil
  • 1/2 cup grated Parmigiano or other similar cheese of choice
  • 1/2 tsp salt
  • black pepper to taste
Process:
  1. Remove the top flowery part of the garlic scape and cut into 1/2 inch slices

  2. Place garlic scapes and nut (of choice) in food processor until well combined and somewhat smooth

  3. Slowly drizzle in oil and process until integrated

  4. With a rubber spatula, scoop pesto out of bowl and into a mixing bowl

  5. Add cheese, salt and pepper to taste

Marinated Chopped Salad


This is a great recipe that takes an ordinary salad and transforms it into something totally different. So...chopped salad is not just for ordering in restaurants anymore!

This recipe is highly flexible to the produce that you have on hand. So feel free to experiment. Also don't rule out the option to throw in any leftover proteins, cold cuts, nuts, hard boiled egg, cooked beans or hard cheeses.

One factor that might seem obvious is the chopped part. While you might be tempted to just make a salad and put on the marinade, you are short changing your salad immensely. The marinating process is key to this salad. The almost equal cuts for each ingredient allow for the marinade to coat more of the salad giving it a much richer taste and excellent mouth feel.

Exercise patience. You need to allow the salad to absorb the marinade. So make sure to use all 30 minutes (or more) and resist the urge to eat sooner.

Ingredients:

Marinade

  • 1/3 cup apple cider vinegar
  • 1/3 cup olive oil
  • 1 1/2 Tbsp celery salt **
  • 1 1/2 Tbsp sugar or sugar substitute
  • Fresh ground pepper
Salad
  • 3 tomatoes
  • 2 carrots
  • 2 cucumbers
  • 2 stalks celery
  • 1 green or red bell pepper
  • 1 sweet onion
  • 1/2 head green cabbage
Process:
  1. Finely chop all salad ingredients

  2. Add all salad ingredients to a large bowl and toss to mix

  3. Combine all salad ingredients in a container with a lid and shake well to mix

  4. Pour marinade over salad and toss to coat

  5. Place salad in refrigerator for at least 30 minutes before serving to allow flavors to set

** If you can substitute the celery salt with Italian seasoning mix or Greek seasoning mix if you desire - season to taste

Wednesday, July 29, 2009


We Been Working Hard...Don't Miss It

Salsa Week

August 1, 2009 to August 8, 2009

Right here on the CSA Food Project

Salsa creations from avocado to zucchini

A recipe celebration of salsa from the
ordinary to the extraordinary

A Cilantro Lime Gazpacho topped with an Avocado Salsa

Gazpacho is simply a chilled soup made with chopped tomatoes, cucumbers, onions, peppers, and herbs. It is believed to have originated in Southern Spain many centuries ago. Over time gazpacho has made its way around the world to other parts of Europe, South America and Latin America.

It is widely consumed during the summer months due to its refreshing qualities and no heat cooking method. Gazpacho recipes can vary greatly in terms of ingredient composition, texture and thickness. This usually depends on the geographical location as well as family traditions.

Below is a wonderful Nuevo Latino play on gazpacho. The gazpacho is rich in flavor with the sweet acidity of lime, bite of Tabasco and spice from the cilantro. No worries, the avocado salsa offers a nice rounding of this dish.

This meal is a nutritional superstar - high in fiber, low in calories and rich in the good fat. The essence of a great gazpacho is in all the ingredients being the same size, so that every time you bite you get a little of everything. The use of the food processor will assure that no one ingredient should dominate each spoonful.

Ingredients:

  • 1 garlic clove
  • 1 avocado, peeled and diced
  • 1 pound ripe plum tomatoes
  • 1 cucumber, peeled
  • 1 red bell pepper, quartered
  • 1/3 cup cilantro, divided
  • 1/4 cup diced onion, divided
  • 2 tbsp plus 1 teaspoon lime juice
  • 1/4 tsp Tabasco sauce or other hot sauce
  • 3/4 tsp salt
  • 3/4 tsp freshly ground black pepper
Process:
  1. Core and stem the tomatoes and peel and dice the avocado

  2. Set aside 2 tablespoons of onion and 2 tablespoons of cilantro in a small bowl

  3. Place the remaining onion, cilantro and the garlic in food processor and run until the garlic is finely minced

  4. Add the tomatoes, cucumber, red pepper, 2 tbsp lime juice and Tabasco and process until smooth

  5. Add 1/2 tsp of the salt and the pepper; taste - adjust as needed

  6. Refrigerate at least 30 minutes before serving

  7. Meanwhile to make the salsa, add the remaining 1/4 tsp salt, 1 tsp lime juice and avocado to the reserved onion and cilantro - gently mix to incorporate

  8. Plate gazpacho in bowl and top each serving with one-fourth of the avocado salsa

Almost Insta-Pickles!!!

For some reason, one of the ingredients that I always find myself scrambling to use is cucumbers. I have made more cuke salads than I care to think of!

Beyond making cuke salads there is always the option to make pickles. Some might argue it's just easier to purchase them in the store, but I can assure you that the results will not match.

Here is a great one-hour way to make pickles that are as good, if not better, than what you can purchase in the grocery store. The secret is pouring the hot vinegar mixture over slices of cold, crisp cucumber. They are a great harmony of sour and sweet - but still satisfy that traditional need for a vinegar base in pickles.

The beauty of this recipe is that it is low in everything making it healthy for you. The recipe has a refrigerator life of up to 10 days.

Ingredients:

  • 2 cloves garlic, slivered
  • 1 1/4 lbs pickling cucumbers, trimmed and cut into 1/4-inch slices
  • 1 cup cider vinegar
  • 1 cup white vinegar
  • 1 cup light brown sugar
  • 1 cup slivered onion
  • 1 1/2 tsp salt
  • 1 tsp dill seed
  • 1 tsp mustard seed
Process:
  1. Place cucumber slices in a colander set in the sink and sprinkle with salt - stir to combine

  2. Let stand for 20 minutes. Rinse, drain and transfer to a large heatproof bowl

  3. Meanwhile, combine cider vinegar, white vinegar, brown sugar, onion, garlic, dill and mustard seed in a medium saucepan

  4. Bring to a boil and reduce heat and simmer for 10 minutes

  5. Pour the hot liquid over the cucumbers; stir to combine

  6. Refrigerate for at least 10 minutes to bring to room temperature

CSA- Share Details: Week #11


corn, zucchini, cucumbers, leek, green beans, arugala, peaches, swiss chard

Ginger and Lime Zucchini Soup

Here is another refreshing alternative use for zucchini.

I got to admit, making a soup is not the first thing that comes to mind for ways to use fresh zucchini. In looking for the different and unique - this recipe is in that class with the ginger and lime giving it hints of Asian Fusion.

It is certainly a great opening to a meal that will create conversation.

Ingredients

  • 3 shallots, sliced
  • 3 medium zucchini, thinly sliced
  • 1 piece of ginger (one inch), minced
  • 3 cups low-sodium vegetable broth
  • 1/2 cup half-and-half
  • 2 tbsp unsalted butter
  • 2 tbsp fresh lime juice
  • 1 tsp lime zest
  • salt and pepper
Process:
  1. Prep all the ingredients prior to cooking

  2. Melt the butter in a large saucepan over medium heat - add in shallots, salt and pepper, and sauté until soft (about 4-6 mins)

  3. Stir in the ginger and zucchini and cook for an additional 2 minutes to allow flavors to combine

  4. Pour in the lime juice and broth and bring to a boil

  5. Lower the heat and simmer until the zucchini is softened (about 5-8 mins)

  6. Remove from heat and stir in the zest and half-and-half

  7. Purée the soup with an immersion blender

  8. Add salt and pepper to taste

Tuesday, July 28, 2009

User Recipe: Cucumbers & Onions in Vinegar

Lisa... thanks again for a this recipe.

A traditional preparation for cucumber salad.
The recipe takes me back to making cucumber salad with my Grandmother in her kitchen!

You are correct that this recipe can be made with Splenda as a substitute. Also, you can add a pinch of celery seed in for additional flavor.

Lisa writes:
This is a good way to preserve all of the cucumbers that we have been getting, and it makes a great summer salad. My kids have been eating it with every meal. I think that it could be made with Splenda or another sugar substitute, just taste it as you go along

Ingredients:

  • Large Cucumbers
  • 1 Large Onion
  • Water
  • Cider Vinegar
  • Sugar
Process:

1. Thinly slice the cucumbers and onions

2. Add to a large jar or plastic container

3. Cover with equal parts of water, cider vinegar and sugar

4. Refrigerate overnight

User Recipe: Linguine with Swiss Chard


Many thanks to Lisa Cohen-Dumani for her submission of this great recipe for Linguine with Swiss Chard.

As Lisa writes:
This recipe comes from the “Pasta with Sauces” cookbook. It calls for radicchio and pancetta, but I have been making it with swiss chard for years, and I am sure it is just as good without the pancetta.

Ingredients:

  • 1 ½ lbs pasta
  • 1 bunch swiss chard
  • 1 tablespoon olive oil
  • ½ cup white wine vinegar
  • 4 tablespoons unsalted butter
  • 8 quarts water
  • 1 ½ tablespoons salt
  • 6 oz fresh goat cheese crumbled
  • salt
  • 1/3 cup pine nuts, toasted
Process:
  1. Cut the swiss chard off of the stems and chop coarsely.

  2. In a frying pan, heat the olive oil and add the swiss chard and vinegar. Cook covered until completely wilted – about 4 minutes. Remove the lid and simmer until the liquid is reduced by half, about 3 minutes. Stir in the butter and remove from the heat.

  3. In a large pot bring the water and salt to a boil. Cook linguine until tender and drain well.

  4. In a large warmed bowl, combine the linguine, swiss chard mixture, goat cheese and salt to taste. Toss to mix well.

  5. Top with toasted pine nuts.
Serves 8

Julia Child's Classic Ratatouille

Ratatouille is a traditional French Provencal stewed vegetable dish, originating in Nice, France. It is usually served as a side dish, but also may be served as a meal on its own accompanied by rice or bread.

While there are endless recipes and variations for ratatouille, we are going to pay homage the Queen of French cooking Julia Child. The recipe that follows is an adaptation of her classic and timeless recipe as it appeared in Julia's original cookbook - Mastering the Art of French Cooking.

Ingredients:

  • 1/2 lb eggplant
  • 1/2lb. zucchini
  • 1 tsp. salt, plus more to taste
  • 6 to 7 tbsp. olive oil, divided
  • 1/2lb. yellow onions, thinly sliced
  • 1 to 2 green bell peppers, seeded and sliced
  • 2 garlic cloves, minced
  • Freshly ground pepper
  • 2 large, firm ripe tomatoes
  • 3 tbsp. minced flat leaf parsley
Directions:
  1. Peel the eggplant, cut off the stem and cut lengthwise into 3-by-1-by-1/2-inch slices. Trim off zucchini ends. Cut into slices about the same size as the eggplant. Place vegetable slices in a large non-aluminum bowl (glass or plastic is fine). Toss with 1 teaspoon salt; let stand 30 minutes. Drain and pat slices dry on paper towels.

  2. Heat 1 tablespoon olive oil in a large skillet over medium-high heat. Cook eggplant and zucchini slices in batches until lightly browned, about 1 minute per side, adding more olive oil as needed. Set vegetables aside.

  3. Cook onions and bell peppers in the same skillet in 2 to 3 tablespoons oil until tender but not browned, about 10 minutes. Stir in garlic and season with salt and pepper to taste.

  4. Peel tomatoes while the onions and pepper cook by dipping in boiling water, then in ice water to loosen the skins. (Or use a serrated-edge peeler.) Cut out tomato stems, cut tomatoes in half and squeeze out the seeds and excess juice. Slice tomato pulp into1/2-inch strips.

  5. Lay tomato strips over the onion and peppers in the skillet. Season with salt and pepper.

  6. Cover skillet; cook over medium-low heat until tomatoes begin to render juice, about 5 minutes. Uncover and baste tomatoes with cooking juices. Increase heat; boil until juice has almost evaporated, about 2 minutes.

  7. Place a third of the tomato/onion mixture in a heavy Dutch oven or heavy casserole. Sprinkle with 1 tablespoon parsley. Arrange half of the eggplant and zucchini on top. Top with half of the remaining tomato mixture and parsley. Top with the remaining eggplant and zucchini slices. Finish with remaining tomato mixture and parsley.

  8. Cover and simmer over low heat for 10 minutes. Uncover, tip casserole and baste with rendered juices. Adjust seasoning if necessary. Raise heat slightly. Cook, uncovered, until juices have evaporated, about 15 minutes. Stir often to keep vegetables from scorching on the bottom. Serve hot, at room temperature or cold.


Is there much difference in nutrition between yellow squash and zucchini?


I was just recently asked what is the difference. Below is an article from the the University of Ohio Agriculture Extension that explains the differences better that I could.

----------------------------------

For the most part, you're getting similar nutrients whether you choose the generally green-skinned zucchini or the generally yellow-skinned crookneck or straightneck squash.

Both are very low in calories (20-25 calories in a cup of raw slices, and 30-35 calories in a cup of boiled slices). And both are good sources of dietary fiber, vitamin C, vitamin B6, folate, magnesium, potassium and manganese.

Yellow squash is generally higher in copper. But zucchini offers more vitamin K and riboflavin. Plus, compared with yellow squash, you'll find zucchini is chock-full of three carotenoids: beta carotene, lutein and zeaxanthin.

For example, a cup of sliced, boiled yellow (crookneck or straightneck) squash has 175 micrograms of beta carotene and 570 micrograms of lutein and zeaxanthin. The same amount of zucchini has 1,200 micrograms of beta carotene and 2,070 micrograms of lutein and zeaxanthin. Lutein and zeaxanthin reduce the risk of cataracts and macular degeneration, one of the leading causes of blindness. Beta carotene is converted to vitamin A in the body, which plays an important role for many functions: vision, bone growth, reproduction, the immune system, and cell division and differentiation.

Whichever kind of summer squash you choose, be sure to eat the skin. That's where most of the nutrients are. Fortunately, the summer squash's thin skin is soft enough to enjoy whether the vegetable is eaten cooked or raw.

One of the best features of summer squash is its versatility. Raw, it can be chopped, sliced or grated for salads, wraps or veggie trays. To serve hot, it can be baked, steamed, boiled, grilled or cooked with tomatoes, onions, peppers, eggplant or other vegetables for ratatouille. Grated squash adds nutrients and moisture to quick breads, muffins and other baked goods.

When choosing summer squash, select ones that are firm and fairly heavy for their size, with bright, glossy skin. Try to avoid any with nicks, bruises or soft spots -- punctures can lead to decay.

Unfortunately, the ideal storage temperature for summer squash is somewhere between 41 and 50 degrees -- too cool for the kitchen counter, and too warm for the refrigerator. Still, experts recommend placing summer squash in a plastic bag, to help it retain its internal moisture, and storing it in your refrigerator's vegetable crisper. Don't wash or cut summer squash it until you're ready to use it. Under these conditions, summer squash should retain its quality for at least three to five days.

Original Article Link

Monday, July 27, 2009

Cold Avocado-Tequila Soup


Love avocados but cannot stomach the thought of another helping of Guacamole?

This is a great alternative that makes for a great summertime meal. The soup is rich and refreshing with the tequila providing a "nice edge" to the avocado puree.

For this recipe avoid over blending or over processing. The recipe can be made up to 6 hours before you are ready to serve - keep refrigerated. Recipe will yield four servings.

Ingredients:

  • 2 ripe avocados, peeled, pitted, and coarsely chopped
  • 1 jalapeno pepper, stemmed, seeded, and coarsely chopped
  • 1 can chicken broth (15 oz), fat skimmed from top
  • 1/2 cup tightly packed fresh cilantro leaves
  • 1/2 cup lemon juice
  • 1/4 cup tequila
  • 1/2 tsp salt, or to taste
  • 4 lemon wedges (optional)
  • 1 small tomato (optional), cut into 1/4 inch dices
Process:
  1. Place the cilantro and jalapeno in a blender or a food processor

  2. Process until finely chopped, scraping down the sides as necessary

  3. Add the lemon juice, tequila, chicken broth, avocados, and salt and process until smooth

  4. Refrigerate the soup until it is well chilled (about 60 mins)

  5. Ladle the soup into serving bowls

  6. If desired, garnish each bowl with a lemon wedge and a tablespoon of chopped tomato

Sunday, July 26, 2009

Spring Salad with Fennel and Orange

Here is a simple salad recipe that incorporates fennel. With the contrasting salad ingredients, this salad is bright in color. It is accompanies with a zesty, sweet dressing.

The orange is an excellent compliment in taste and texture to the fennel. This is a great recipe to hang on to for those times when you need a special salad to impress the guests or wow the family.

If you own a mandolin, this would be an excellent time to pull it out and use if for the fennel. Just remember to go slow, be smart, use the hand guard and be aware of where your fingers are.

Ingredients:

Dressing:

  • 1/4 cup white sugar or Splenda
  • 1/4 cup red wine vinegar
  • 3 tbsp olive oil
  • 1 tbsp chopped fresh basil
  • salt and pepper to taste

Salad:
  • 10 ozs mixed salad greens
  • 1 small fennel bulb, thinly sliced
  • 1 orange, peeled and segmented
  • 1/2 red onion, thinly sliced
  • 1/2 cup slivered almonds
  • 1/2 cup dried cranberries
Process:
  1. In a small bowl whisk together all of the dressing ingredients until the sugar is dissolved and emulsified

  2. In a large salad bowl, combine all salad ingredients

  3. Pour dressing on salad and toss to coat

Blackberry Fool


This is a great summertime favorite that both the kids and adults devour. I especially love to make this recipe with the kids right after a nice day of berry picking at the local farm.

The sauce is made by macerating the blackberries with a little bit of sugar. Half of the berry sauce is mixed into the whipping cream and the other part becomes the topping.

This is a very flexible recipe that works well with all kinds of berries (strawberries, raspberries and blueberries). I do like to reserve a few whole berries to top the dish.

The recipe will yeild 4 servings. I usually aim to double this recipe since it is guaranteed to be gone.

Ingredients:

  • 1 pint fresh blackberries, picked over and rinsed
  • 2/3 cup heavy cream
  • 3 tbsp confectioners' sugar, or to taste
  • 1/2 tsp vanilla extract or vanilla bean paste
Process:
  1. Combine the blackberries and 2 table­spoons sugar in a medium-size bowl

  2. Mix with a fork, gently squeezing about half of the berries to release some of their juice - do not mash all of the berries - leave some intact

  3. Let the berries sit for about 20 minutes - stir once or twice to make sure that all of the sugar dissolves

  4. Whip the cream with the vanilla and remaining tablespoon sugar with an electric mixer until the cream holds soft peaks

  5. Fold in half of the blackberry mixture

  6. Spoon the blackberry cream into 4 serving bowls

  7. Spoon the remaining blackberries over each bowl

  8. Serve immediately

Saturday, July 25, 2009

The Nine-A-Day Superfoods Power Salad

Inspired by the USDA's Nine-a-Day Program for vegetables, this recipe packs all the daily requirements into a single powerhouse of a meal. This recipe features several of the super foods that everyone should be eating on a daily basis.

While the list of ingredients might look long, it is not as big a deal as you might think. To add a little bit more punch to the meal, add a low fat protein like tuna, salmon or chicken. Also, you will notice that most (if not all) of the ingredients are usually available at a semi-decent salad bar making it that much easier.

Ingredients for Dressing:

  • 1 clove garlic - minced
  • 2 tbsp cider vinegar
  • 1 tbsp + 1 tsp olive oil
  • 1 tsp fresh lemon juice
  • 1/2 tsp dried basil
  • 1/2 tsp dried oregano
  • 1 tsp salt
  • Freshly ground black pepper
Ingredients for Salad:
  • 8 cherry tomatoes
  • 4 red bell pepper rings
  • 4 green bell pepper rings
  • 3 slices red onion, thinly sliced and separated into rings
  • 1 large mushroom, thinly sliced
  • 2 cups fresh spinach, torn into bite sized pieces
  • 1 cup broccoli or cauliflower florets
  • 1/2 cup black beans or chickpeas
  • 1/2 cup sliced carrots
  • 1/2 cup sliced zucchini
  • 2 tbsp whole soy nuts
Process for Dressing:
  1. In a large shaker or "Rubbermaid" container combine the vinegar, lemon juice, basil, oregano garlic and salt

  2. Shake gently to combine all ingredients

  3. Add the oil and several grinds of fresh pepper to mixture

  4. Cover tightly and shake vigorously to blend

  5. Set aside for at least one hour for the flavors to set
Process for Salad:
  1. In layers, add the broccoli, green/red pepper rings, onion, beans, zucchini, mushrooms, carrots, tomatoes, and spinach

  2. Re-shake the salad dressing and add to salad - tossing to coat

  3. Salad can be served immediately or can marinade in the refrigerator up to 24 hours

  4. Prior to serving garnish with soy nuts (and supplemental protein if being used)

Friday, July 24, 2009

Puree of Carrot and Shallot

One of the scariest times I can recall in culinary school was during preparation of purees. What you come to learn real quick is that the proper technique and seasoning is paramount when making a really good puree.

Unlike other dishes that can be doctored with other ingredients to fix mistakes, there is nowhere to hide with a puree. Just a few humble ingredients to make culinary magic.

Truth be told...it's not hard at all. I think the exercise was more to humble us regarding the importance of good ingredients and proper skills.

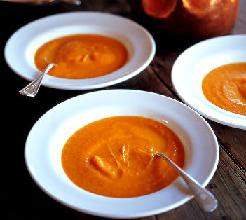
Below is a wonderful bright carrot puree that is nicely complimented with the sweetness of the sautéed shallots. As an added bonus, the cooking of the carrots amplifies the amount of beta-carotene in the dish. So good for you and great tasting!

Ingredients:

  • 1 pound carrots, thickly sliced
  • 1 large shallot, minced
  • 1 tbsp olive oil
  • Salt
  • Freshly grated nutmeg
Process:
  1. In a medium saucepan, cover the carrots with water and simmer over moderate heat until tender (18 to 22 mins)

  2. When done, drain carrots and reserving the cooking liquid

  3. In a skillet, heat oil and sauté the shallot over moderately low heat until softened (about 6 to 8 mins)

  4. Transfer to a food processor with the carrots and 1/3 cup of the cooking liquid and process until smooth. Alternatively you can use a blender or immersion blender - just be careful

  5. Transfer to a serving bowl and season with salt and nutmeg

What to do with all the Hot Peppers?

This one goes out to all the chili heads out there. Ever find yourself in a situation where you got more hot peppers than you can use. This usually happens to me midsummer as all of my friends gardens start to provide an abundance of hot peppers.

In the spirit of nothing going to waste, here is a simple base recipe that you can use with any hot pepper to make a simple pepper sauce that can be used in place of a traditional red hot sauce.

If you are a brave soul, feel free to dip in and eat the pickled peppers. If you don't eat the peppers, you can usually refill the bottle with vinegar three times before you need to swap out the peppers.

This is a seriously "old school" recipe with roots deep in Mexican/Cowboy cookery that is a whole lot easier than making "Tabasco like hot sauce". Depending upon where you travel, the pepper used will change but the recipe is all the same.

The recipe will keep for six months in the refrigerator. Given its long shelf life, I usually like to make a few additional bottles to gift to friends. After all if you are going to make the effort!

Few notes on the recipe:

  1. Do not use distilled white vinegar (YUCK)... use a white wine vinegar

  2. Store mixture in a glass container with a non-metallic lid (to avoid the vinegar eating at the metal and discoloring the liquid)

  3. Use a container with a mouth large enough to accommodate the pepper you want to use in whole form

  4. You will need to sterilize the jars - no big deal. Two ways you can do it: (a) clean the bottles with boiling water or (b) place the jars on the bottom rack of the dishwasher and run with heat dry. Either way will sterilize the bottles. If you are not planning on doing this right away, place aluminum foil over the mouth of the bottle. Careful not to touch the foil side that will be inside the mouth of the bottle.
Ingredients:
  • 1/2 cup fresh chili peppers of your choice
  • 1/2 cup white vinegar
Process:
  1. Stuff the peppers into the jar - more the merrier without crushing the peppers

  2. Boil the vinegar in a small saucepan on low heat until the vinegar steams - avoid boiling the vinegar

  3. Pour the vinegar into the jar to the top of the chilies

  4. Allow the mixture to sit for at least one day prior to using

Thursday, July 23, 2009

Grilled Corn Soup


Corn soup is good... grilled corn soup is great!!! There is something about that smokey characteristic that takes this traditional corn soup up a few notches.

Given the contributions of each of the ingredients, I am hesitant to suggest substitutions. Each ingredient builds to make this a great soup.

This is a very straightforward recipe that take advantage of the bounty of the season. This is a recipe that can be made up to three days prior and stored in the refrigerator

Ingredients:

  • 1 dozen ears of corn, shucked
  • 4 garlic cloves, smashed
  • 3 cups water
  • 3 cups chicken stock or canned low-sodium broth
  • 1 large onion, finely chopped
  • 1 large carrot, finely chopped
  • 1 celery rib, finely chopped
  • 1 bay leaf
  • 2 tbsp corn oil
  • 1/2 tsp crushed red pepper
  • 1/4 tsp ground coriander
  • Pinch of ground cloves
  • Salt and freshly ground pepper
Process:
  1. Grill the corn until the kernels are well browned - turn frequently. Alternatively, you can pan-roast the corn in a cast-iron skillet over low heat

  2. When done remove corn from grill and cut the kernels off the cobs

  3. Heat oil in a large saucepan and add the onion, carrot, celery and garlic

  4. Cover and cook over low heat until the vegetables soften (about 13 to 16 mins) - remember to stir frequently

  5. Add the bay leaf, crushed red pepper, coriander and cloves and cook for 2 additional minutes

  6. Add the corn, water and stock and bring to a boil

  7. Reduce the heat to moderately low, cover partially and simmer for 40 minutes

  8. Discard the bay leaf

  9. Transfer the soup to a blender or food processor and puree until smooth. Alternatively if you have an immersion blender you can use it

  10. Strain the soup into a large saucepan - pressing hard on the solids

  11. Thin the soup with water if necessary

  12. Reheat and season with salt and pepper

  13. Ladle into serving bowls and serve hot

Wednesday, July 22, 2009

A Non Borscht Beet Drink!

Not sure if this one pushes the envelope... but it's a cool drink recipe using beets that is not borscht.

I would categorize this as a vitamin and mineral packed drink. Tang from the pineapple with the bite of ginger are combined to balance the beets and tomatoes.

This is an exact recipe that I would not attempt to scale. To avoid the beets overpowering the drink, I would suggest making in batches. Please note that this is a recipe intended for a juicer.

Ingredients:

  • 1 medium beet (5 ounces)**
  • 3 ripe plum tomatoes
  • 1.5 cups diced pineapple
  • 1 piece of ginger (about 1.5 ozs)
  • teaspoon salt
Process:
  1. Peel the beets and ginger

  2. Peel and core the pineapple

  3. Rough chop the beets, ginger, tomato and pineapple

  4. In an electric juicer in the following order - juice the beet, tomatoes, pineapple, and ginger,

  5. Mix in the salt and serve immediately.


** Feel free to experiment with other non-red varieties of beets

First CSA Member Event

**As of 7:30am (7/22), we received 12 rsvp's right away! Would be happy to take a couple of stand-by names. Just rsvp to the "stand-by" list on the Evite.

Clearly, there is interest in this event, so we will begin planning for another. Please let us know if you are interested in hosting or have any other event ideas.

CSA Tasting and Cooking Demo with Chef Mike

Join us for an intimate evening designed to explore, teach, and highlight our CSA bounty. This is a cooking demo and tasting menu, not a full meal. Limited seating event (max 12) with plans to repeat.

No cost, but we will ask you to bring a drink or dessert to share.

Our vegetarian menu (subject to harvest or whims of the weather):
Watermelon and Cucumber Tonic
Tropical Salsa with chips
Beet Carpaccio
Napa Asian Salad
No Cook Summer Sauce with Whole Wheat Pasta

Email if you have not received the Evite...or need a re-send.

Tuesday, July 21, 2009

Fennel Mashed Potatoes

I figured it was just a matter of time until we were to be greeted with fennel in our CSA shares. This recipe was specifically chosen since it makes use of both potato and fennel - two items from this week's delivery.

For some fennel is a hard sell. To ease into using fennel, I thought I would offer up a simple variation on a familiar side dish. It is an excellent alternative to your traditional mashed potatoes.

Ingredients

  • 2 1/2 pounds russet potatoes or Yukon Gold potatoes, peeled, cut into 2-inch pieces
  • 1 fennel bulb, trimmed, quartered, cored, thinly sliced crosswise
  • 1 cup (or more) half and half
  • 2 tablespoons (1/4 stick) butter
  • 1/2 teaspoon fennel seeds, crushed
  • Salt and pepper
Process
  1. Melt butter in heavy large skillet over medium heat

  2. Add sliced fennel bulb and crushed fennel seeds and stir to coat

  3. Sprinkle with salt and pepper

  4. Reduce heat to low, cover, and cook until fennel is tender but not brown, stirring often ( about 17 to 22 mins)

  5. Place potatoes in large saucepan - cover with cold water and bring to boil

  6. Reduce heat to medium and boil until potatoes are tender (12 to 17 minutes)

  7. Drain potatoes and return potatoes to pan

  8. Cook over medium heat until no liquid remains

  9. Proceed to mash potatoes

  10. Add 1 cup half and half to fennel mixture and bring to simmer

  11. Working in 2 batches, add fennel mixture to potatoes and stir to combine

  12. Season with salt and pepper to taste

CSA Share Details- Week #10


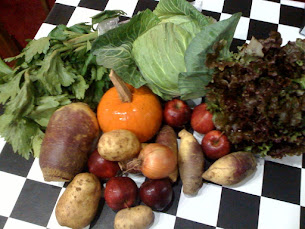
Sorry we are not getting the heads up, but this week we had: fennel, potato, zucchini, cucumbers, carrots, onions, green beans, red leaf lettuce, corn on the cob.


Kohlrabi Cinnamon Bake

While I am somewhat familiar with Kohlrabi, I cannot profess total mastery of this ingredient. I happen to stumble on this recipe online this evening and it caught my attention. From what I can gather, it appears to be a savory play on the baked apple with a hint of "sweet" (from the cinnamon). It was unique enough that I thought I would offer it up as an alternative to way to prepare your Kohlrabi.

The original recipe was from Vegetarian Gourmet - Spring 1994. This will be on my "to cook" list in the next few weeks. If you happen to beat me to the recipe, please post your results and comments.

Ingredients:

  • 6 medium kohlrabi bulbs, peeled
  • 1 large sweet onion, chopped
  • 1 teaspoon cinnamon
  • 1 tablespoon sunflower oil
  • 1/2 cup breadcrumbs
  • 1 tablespoon arrowroot powder
  • 2 tablespoons cold water
  • Salt & pepper
  • Parsley sprigs, to garnish
Process:
  1. Bring water to a boil in a large saucepan. Immerse kohlrabies & boil until they are tender-crisp when pierced with a fork, about 20 minutes. Drain & cool. Trim 1/4" from the root end of the kohlrabies. Scoop out pulp from the opposite end leaving 1/4" thick shells. Dice the pulp & set aside. Place shells in a lightly oiled baking dish.

  2. Preheat oven to 350F. In a separate bowl, toss diced pulp onion, cinnamon, oil & breadcrumbs. Press mixture into shells. Bake uncovered until the onions are limp & caramelized, about 20 minutes. Transfer to a warmed serving platter & keep warm. Reserve the liquid.

  3. In a separate bowl, mix the arrowroot with the water, stirring until completely dissolved. Set aside. Pour reserved liquid into a small saucepan & bring to a boil. Remove from the heat & slowly add the arrowroot, stirring constantly. Add more water as may be necessary so that you have a sauce like consistency.

  4. Spoon sauce around the stuffed kohlrabies, garnish with parsley & serve immediately

    (Serves 6)

Monday, July 20, 2009

Two Kohlrabi Recipes

Below are two recipes and a message from member Allison Gordon-Beecher. Many Thanks for your time and effort.

-------------------------------------
Note and recipes from Allison:
I was one of the volunteers manning the table at today's CSA pick-up and, of course, chatted with many people as they came to pick up their veggies. Well, it came out from quite a few that they still had their kohlrabi sitting in the fridge because they hadn't known what to do with it, so I promised that I would post the recipe I had used. I'm actually going to share two, because there was another one that I had planned to try if we ever got another kohlrabi. Maybe someone else can let me know how it came out . . . BTW, I got both recipes off of Recipezaar.com.

Avocado and Kohlrabi Salad

15 min 15 min prep

SERVES 4

Ingredients:

  • 3 medium kohlrabi, bulbs
  • 2 ripe avocados
  • 3 tablespoons lime juice
  • 1 scallion, chopped
  • 2 tablespoons balsamic vinegar
  • 6 tablespoons extra-virgin olive oil
  • 1/4 teaspoon garlic powder
  • salt
  • fresh ground pepper
  • 1/4 cup crumbled feta cheese
Process:

1. Peel the kohlrabi by cutting off the top and bottom, and peeling with a potato peeler.

2. Cut into 1/4-inch-thick slices, then cut the slices into chunks.

3. Place in a bowl.

4. Cut avocados in half lengthwise.

5. Tap the blade of a heavy knife in the pit, twist to remove, and discard.

6. Quarter and peel avocados, then cut into chunks.

7. Drizzle lime juice over avocados to prevent browning and to add flavor; set aside.

8. Whisk together green onion, balsamic vinegar, oil, garlic powder, and salt and pepper to taste.

9. Pour dressing over kohlrabi and mix to cover.

10. Mix together the chunked avocados and the kohlrabi mixture.

11. Make a bed of the salad on four plates, and sprinkle each with feta cheese.

12. Serve and enjoy!


NOTE: I only had one kohlrabi so that's all I used, but followed the rest of the recipe as written. I think next time I would cut the dressing in half unless I had the full amount of kohlrabi and avocado. It was a bit much for the amount of salad.


Kohlrabi for the Novice

This recipe is from the Sept. 16, 2008 edition of the "Living" section of our local newspaper, "The Democrat & Chronicle" (adapted from "In Praise of Pecans by June Jackson" ). I have never tried kohlrabi, but it has been described as a member of the cabbage family but more mild than its broccoli and cauliflower cousins. The article states "pecans and honey accentuate the vegetable's sweet side". I have not cooked this yet but am eager to try it.

by MarthaStewartWanabe

25 min 10 min prep

SERVES 4

Ingredients:
  • 4 kohlrabi, bulbs small, peeled and cut into 1/4-inch strips
  • 1/2 cup carrot, shredded
  • 2 tablespoons honey
  • 2 tablespoons pecans, toasted and coarsely chopped
  • 2 tablespoons lemon juice, fresh-squeezed
  • 1/4 teaspoon lemon zest, finely grated
  • 1 tablespoon chives, snipped
  • 1 tablespoon unsalted butter
Process:

1. Bring a large saucepan of water to a boil over medium-high heat.

2. Add the kohlrabi and carrot and cook for five minutes or until kohlrabi is tender.

3. Meanwhile, combine honey, pecans, lemon juice, lemon zest and chives in a small bowl. Stir to mix well and set aside.

4. Drain vegetables and place in a serving bowl.

5. Top with the honey mixture and butter, stirring to combine.

6. Serve immediately.

7. To toast nuts in a skillet: Cook them in a dry skillet over mediumlow heat for around seven minutes, turning them occasionally to prevent burning, until they are fragrant and visibly darkened. Then cool completely.

Aqua Frescas


So you ask... what is Aqua Frescas?

It is the Mexican answer to a beverage that greatly complements spicy cuisine. This is a wonderfully refreshing and unique potion that provides a nice counter to the heat of any spicy meal or as a "pick me up" on a hot summer day.

Non-alcoholic in nature, it is a great concoction that the kiddies along with adults can enjoy.

The recipe below is for a melon combo but feel free to experiment with just watermelon, cantaloupe or honeydew by themselves.

Ingredients:

  • 4 cups of cubed seedless melon - combo of watermelon, honeydew and cantaloupe
  • 1/4 cup sugar or Splenda
Process:

1) Place ingredients in blender and blend until smooth - scraping down the sides

2) Strain mixture to separate the liquid from the solids with wire mesh - discard solids

3) Add two cups of cold water to melon liquid - chill or serve immediately

Kimchi - A Quick Cheat Recipe

Kimchi is an absolute necessity in every Korean meal. It is a part of the table place setting that combines the savor, nutrients and preservability in one environmentally-sound food. It is a cornerstone of Korean culinary culture.

Every culture maintains unique ways of cooking and preserving foods. But when it comes to preserving vegetables, kimchi can be viewed as one of the best way in the world. The Korean winter lasts for three to four months, which means Koreans have to survive until spring with only what they harvested in fall. In order to have a supply of almost fresh vegetables during winter, the Korean people have developed a very effective way of preserving them: kimchi.

Kimchi can be made of one or more kinds of vegetables including radish, Chinese cabbage and cucumber by salting the vegetables and seasoning with chili, garlic, scallion, ginger, and fish juice. After fermenting for a period of time at an appropriate temperature in a sealed container, the mixture of ingredients is turned into a nutritious food which is abundant in vitamins, minerals and fiber.

This recipe is a cheat recipe for kimchi. It is a quick, spicy, tangy cabbage dish that can stand in for the traditional salty Korean staple. Unlike fermented kimchi, this quick variation is best eaten shortly after preparation and does not keep its crunchy texture when stored. This recipe is great with grilled meats, fish or chicken.

Ingredients:

  • 3 scallions, sliced
  • 2 cloves garlic, minced
  • 1 carrot, peeled and grated
  • 1 small head Napa cabbage
  • 2 tbsp distilled white vinegar
  • 1 tbsp toasted sesame oil
  • 2 tbsp finely grated fresh ginger
  • 3/4 tsp salt
  • 1/2 tsp sugar
  • 1/2 tsp crushed red pepper
Process:
  1. Core and shred/chop the Napa cabbage

  2. Combine cabbage, garlic and water in a large saucepan and bring to a boil over high heat

  3. Reduce heat to medium-low and cook, stirring once or twice, until tender, 4 to 5 minutes

  4. In a separate large bowl, whisk vinegar, oil, ginger, salt, sugar and crushed red pepper

  5. Add the cabbage, scallions and carrot to the bowl and toss to combine

  6. Refrigerate for about 25 minutes to let flavors set before serving

* Napa cabbage is also commonly referred to as Chinese Cabbage - you may find it under either name in the local grocer.

Sunday, July 19, 2009

Watermelon Gazpacho


When it comes to food, I am always looking for recipes that are familiarly different. This certainly fits into that category.

This recipe cannot be easier - its all made in the blender. A few chops, a little buzz-buzz and serve. Best part, its a make ahead meal... more entertaining and less cooking!

This recipe is particularly impressive served off a tray in small shot glasses with a small garnish of dill and feta. Recipe serves eight but scales easily

Ingrendients:

  • 6 large tomatoes, pureed
  • 1 Serrano or Jalapeño chili
  • 1 cucumber, seeded and minced
  • 1/4 cup extra-virgin olive oil
  • 1/4 cup crumbled feta cheese
  • 8 ozs fresh watermelon
  • 2 tbsp red onion, minced
  • 2 tbsp fresh dill, minced
  • 2 tbsp red wine vinegar
  • Salt and freshly ground black pepper
Process:
  1. In a blender, pulse the tomatoes, chili, and melon until almost smooth

  2. Add the red wine vinegar and olive oil and pulse until well combined

  3. Fold in the onion, cucumber, and dill

  4. Season to taste with salt and pepper

  5. Chill for two hours - season again before serving

  6. Serve at room temperature

Snap Bean Salad - Deli Style

  • 4 small summer squash (sliced,
    steamed 3 mins)
  • 3 cups sliced cooked snap beans
  • 1 onion, chopped
  • 1 cup sour cream
  • 1 cup cooked garbanzo beans
  • 3 tbsp olive oil
  • 2 1/2 tbsp red wine vinegar
  • 2 tsp vinegar
  • 1 tsp salt
  • 1 tsp sugar
  • 1 tsp dry mustard
  • 1/2 tsp lemon juice
  • 1/4 tsp paprika
Process:

1) Combine cooked snap beans, onion, olive oil, 2 tsp vinegar, summer squash and beans - chill

2) Mix vegetables will remaining ingredients EXECEPT sour cream

3) Marinate mixture in refrigerator overnight or longer

4) Before serving add sour cream

Saturday, July 18, 2009

Minted Cucumber Dip

This dip is refreshingly delicious and mega easy to prepare - five minutes to be exact!

Serve with raw veggies, pita bread, crackers, or spicy foods.

Ingredients:

  • 1 medium cucumber, peeled and seeded
  • 1 cup yogurt
  • 1 tablespoon finely chopped fresh mint
Process:
  1. Briefly puree the cucumber in a blender

  2. Stir in the yogurt and mint

Friday, July 17, 2009

Science & Research

From CSA member Jessica E.
Organic tomatoes: Greater health benefits
Source: http://www.examiner.com/

Reducing our food down to its micronutrients is the most unromantic way to look at food we’ve come up with yet. Gone are the descriptions that tempt us and make our mouths water. We’ve tossed out the sweet, tang of a tomato on our lip and replaced it with the cancer fighting attribute of lycopene. B...

Basic Ceviche

I think that there are two camps when it comes to Ceviche - those that love it and those that don't understand it. I get that some folks just don't do the fish thing for whatever reason - and I am cool with that - more fish for me!

My personal theory is that many Americans have an aversion to anything raw (meat for sure and for some produce). Let's face it, it took 30+ years for Sushi to come into the mainstream and even today there are "meat and potato" folks that would not think to try it.

So why the rant? I needed a dish for a bi-weekly community happy hour and ceviche was my dish of choice this week. In thinking about this happy hour meal, I thought I would share some thoughts and hopefully inspire you to experience something new that is super easy and healthy to make at home.

Let's start with the fundamentals - what is ceviche? Ceviche is a dish comprised of raw seafood, marinated in a citrus-based sauce. Although grapefruits, tangelos, and oranges are sometimes used in the marinade, lemons and limes are the traditional citrus ingredients. In addition to creating a fantastic flavor, the citrus also pickles the fish. Therefore, the fish generally tastes as though it has been cooked. In a nutshell, the tender flesh of the seafood is slowly marinaded and cooked via the acid of the citrus.

Ceviche is often served with vegetables such as corn and potato. Of course, there are regional variations on ceviche. Some places traditionally serve a shark ceviche. Others are known for their octopus ceviche. Others still make ceviche with shellfish such as shrimp, conch, and mussels.
Like many centuries-old dishes, ceviche has been enjoyed in many different ways by many different peoples.

Below is a basic recipe for ceviche that anyone can make. The recipe serves four but easily scales. The margin of error is almost non-existant since all you need to do is chop, marinade and serve. Let the citrus do all the work for you. Ceviche makes for an excellent appetizer with chips or as a main meal on a hot summer day.

Ingredients:

  • 7 ounces halibut or other white fish, diced
  • 1 avocado, diced
  • 3 green onions, sliced
  • 1 plum tomato, diced
  • 2 cloves garlic, roasted, peeled, and crushed
  • 2 tablespoons fresh jalapeno or Serrano chile
  • Juice of 1 lime
  • 1 bunch fresh cilantro, finely chopped
  • Salt
Process:
  1. In a non-reactive bowl, marinate the fish in the lime for 1 hour, stirring occasionally

  2. Prepare the rest of the ingredients during this time

  3. After one hour, add remaining ingredients to the seafood and season with salt

  4. Let stand in a cool place or in the refrigerator before serving

P.S. For those of you looking for other variations of ceviche using a particular fish, let me know and I will get you a specific recipe.

A Simple Potato and Leek Soup

Here is an easy 5 ingredient soup recipe that does not use milk or cream.

As a milder member of the onion family, the cooked leeks will provide an excellent sweet flavor.
Because of the high starch content from the potatoes, the soup is intended to be served hot/warm.

While you might say this is a hearty winter soup, given the addition of leeks and the ongoing potatoes to our CSA shares...well,,, why not serve warm with a nice slice of artisan bread?

Ingredients:

  • 8 leeks cut into small round slices
  • 5 large potatoes, peeled and diced
  • 8 cups of water
  • 4 tbsp olive oil (or butter/margarine)
  • salt and pepper to taste
  • parsley to garnish
Process:

1) Heat oil or substitutes in large soup pot and add the leek slices

2) Sauté the leeks for until they start to soften but not brown ( 3-4 mins)

3) Add the water and potatoes and cook on medium heat, covered for one hour

4) Add salt and pepper

5) Carefully mash what is left of the potatoes in the soup pot

6) Plate in a soup bowl and garnish with parsley

Grilled Fish Tacos Primer


After reading the article on Grilled Fish Tacos from my friends at Chow.com, I thought I would share their article for your enjoyment.

I will save my kid friendly version for another day. The folks at Chow did a great job.

Link to Chow.com's Grilled Fish Tacos

Thursday, July 16, 2009

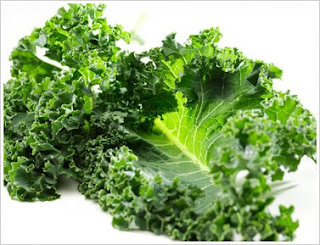
Garlic-Braised Kale with Sun-Dried Tomatoes


I stumbled across this recipe online searching for something else this morning. After looking over the recipe, I thought of all you kale converts.

It is a pretty straightforward sauté recipe originally presented by PBS Celebrity Chef - Christina Pirello.

Based on the ingredient list, the recipe looks like it has a nice hit of garlic, sweet and a zing of heat/spice. The dish should have a great range of complexity and flavor.

Two items that might be less familiar on this list are Mirin and Piccante spice. A few notes on both:

  • Mirin is an essential condiment (on the sweeter side) used in Japanese cuisine. It is a kind of rice wine similar to sake but with a substantially lower alcohol content. Mirin can be found in the Asian foods section of the local grocer or at an Asian market.
  • Piccante spice is a Italian spice mixture (on the spicy side) that you should be able to find at a larger grocer or specialty market. Given the small amount called for in the recipe, I believe that you can safely use a traditional Italian spice mix in its place or omit all together.
Ingredients:
  • extra virgin olive oil
  • 6-7 cloves fresh garlic, thinly sliced
  • 1 red onion, diced
  • sea salt
  • generous pinch piccante spice
  • 3-4 tablespoons diced oil-packed sun-dried tomatoes, drained well
  • 1 medium bunch kale, rinsed well
  • grated zest of 1 lemon
  • 1/2 cup spring or filtered water
  • 2 tablespoons mirin
  • 1 teaspoon balsamic vinegar
  • 1/2 cup lightly toasted hazelnuts, coarsely chopped
Instructions
  1. Place a small amount of oil, garlic and onion in a deep skillet or wok and turn heat to medium

  2. When the onions begin to sizzle, add a generous pinch of salt, piccante spice and saute for about 2 minutes

  3. Stir in sun-dried tomatoes. Remove kale stems, dice and stir into skillet

  4. Slice kale leaves and stir them, with lemon zest, into skillet, season to taste with salt and saute for 2 minutes

  5. Add water and mirin, cover and reduce heat to low

  6. Cook until kale is quite wilted and a deep green, about 8 minutes

  7. Remove from heat and stir in vinegar

  8. Transfer to a serving plate and garnish with hazelnuts

Makes 3-4 servings.

Fresh Thyme and Oregano Marinade

What can I say... Oregano and Thyme - classic combination...yum! The mixture of these herbs provides a refreshing taste to everything it coats.

I love this marinade because its easy, tasty and highly versatile. It works well with just about anything from proteins to salads to veggies - on and off the grill.

Ingredients:

1 cup extra-virgin olive oil
1/2 cup packed fresh oregano **
1/3 cup freshlemon juice*
1/3 cup dry white wine
1/4 cup packed fresh thyme leaves
1 medium yellow onion, peeled and quartered
2 teaspoons kosher salt
1 teaspoon freshly ground black pepper

Process:

Combine in blender until mixture is smooth - dont over blend (about 60 to 90 seconds). Place in fridge until ready to use. Will store for 2 to 3 days.

* About two fresh lemons
** use only the leaves and tender stems from the oregano

Tzatziki

Simple and refreshing, Tzatziki is traditionally served as an appetizer and can be left on the table as an accompaniment to foods throughout the meal. The key to great tzatziki is the thick creamy texture that allows it to be eaten alone, as a dip, as a spread, and as a condiment.

You can serve it immediately upon preparation or as many prefer to allow the tzatziki to sit in the refrigerator for a few hours for the flavors to blend. It can be served chilled or at room temperature. Accompany with fresh bread, veggies or as a side sauce.

Ingredients:

  • 1 cucumber, unpeeled and seeded
  • 1 pint plain yogurt**
  • 1/2 cup sour cream
  • 1 tbsp plus 1/2 teaspoon kosher salt
  • 2 tbsp freshly squeezed lemon juice
  • 1 tbsp Champagne vinegar or white wine vinegar
  • 1 tbsp good olive oil
  • 1 1/2 tsp minced garlic
  • 1 1/2 tsp minced fresh dill
  • freshly ground black pepper
Process:
  1. Place the yogurt in a cheesecloth or paper towel-lined sieve and set it over a bowl

  2. Grate the cucumber and toss it with 1 tablespoon of kosher salt - place it in another sieve and set it over another bowl

  3. Place both bowls in the refrigerator for 3 to 4 hours so the yogurt and cucumber can drain

  4. Transfer the thickened yogurt to a large bowl

  5. Squeeze as much liquid from the cucumber as you can and add the cucumber to the yogurt

  6. Mix in the sour cream, vinegar, lemon juice, olive oil, garlic, dill, remaining salt, and pepper

** can be low fat or whole milk yogurt

Quick Sesame Cucumber Salad - Asian Style

This is another easy refreshing preparation for cucumbers. It makes for a quick side salad.
It pairs nicely with grilled proteins and as a side to any Pan-Asian meal.

For added effect, cut cucumbers on bias, mandolin into thin cuts or cube cucumbers. Black sesame seeds make for a nice finish. Also, don't hesitate to add other veggies such as red onion or shredded carrot.

The recipe call for rice vinegar and sesame oil. These are core ingredients for this recipe and cannot be substituted. If you don't have this two ingredients, I would say that they are well worth having in your pantry.

One word of caution, sesame oil is very powerful. A little goes a long way. While it is a cooking oil, you use it more for aromatics and complexity of flavor. Because there are variances in brands, I suggest starting with half the quantity and add to taste from there.

Ingredients:

  • 3 cucumbers, peeled and seeded
  • 1 tablespoon kosher salt
  • 2 tablespoons white sesame seeds
  • 2 tablespoons rice wine vinegar
  • 2 tablespoons toasted sesame oil
  • 1/2 teaspoon sugar
  • 1/4 teaspoon crushed red pepper flakes
Process:
  1. Peel and seed cucumbers and cut on the diagonal into thin slices

  2. Toss the cucumber pieces with kosher salt, transfer to a colander, and let drain for 1 hour

  3. Toast white sesame seeds in a dry skillet until they’re golden brown - remove from heat and let cool

  4. Whisk together rice wine vinegar, toasted sesame oil, sugar, and crushed red pepper flakes in a container and set aside

  5. Rinse the cucumber slices thoroughly under cold running water and pat dry with paper towels

  6. Toss the cucumbers with the dressing and toasted sesame seeds and serve

Wednesday, July 15, 2009

Chocolate Zucchini Muffins


While it might seem a bit odd to combine zucchini and chocolate, it actually pairs rather well in a subtle way. The muffins don't overwhelmingly taste like zucchini, but zucchini does adds a great texture and keeps the muffins very moist.

It is a great recipe to do with the kids to show them that they do "like" zucchini. After one muffin, they will be begging for more.

The muffins freeze nicely when wrapped individually. They make for a great morning snack in the office - just let defrost at the desk.

This recipe will prepare about 12 muffins.


Ingredients:

  • 1 1/2 cups all-purpose flour
  • 1 cup shredded zucchini
  • 3/4 cup sugar
  • 1/2 cup olive oil
  • 1/4 cup miniature semisweet chocolate chips
  • 1/4 cup chopped walnuts
  • 1/4 cup milk
  • 1 tbsp lemon juice
  • 1 tsp vanilla extract
  • 1 tsp baking soda
  • 1 tsp ground cinnamon
  • 1/2 teaspoon salt
  • 1 egg, lightly beaten
Process:
  1. Preheat oven to 350 degrees

  2. In a bowl, combine flour, sugar, baking soda, cinnamon and salt

  3. In another bowl, mix egg, oil, milk, lemon juice and vanilla

  4. Stir into dry ingredients just until moistened

  5. Fold in zucchini, chocolate chips and walnuts

  6. Fill greased or paper-lined muffin cups two-thirds full

  7. Bake for 20-25 minutes or until muffins test done

Zucchini and Leek Frittata - Oven Baked


A frittata is nothing more than an Italian omelette that can be prepared with or without additional ingredients, such as meats, cheeses, and vegetables. The initial preparation of a frittata is similar to that of a traditional French omelette being prepared in a skillet. However, whereas an omelette is cooked to completion on a stovetop and served folded, a frittata is first partially cooked on a stovetop but then broiled to finish, and served open-faced.

A frittata is so versatile, you can basically use whatever ingredients are in season for the filling with great results. The basic preparation for a frittata is to cook the frittata in the skillet until the eggs are set. Then the cheese is sprinkled on top and the frittata is placed under the broiler until the cheese is all bubbly and browned.

A frittata can be served at room temperature or cold making it a very flexible main course for a lazy weekend brunch or as a "breakfast for dinner" meal. While most frittatas are made in a large skillet and cut into slices like pizza, don't over look the opportunity to bake your frittata in small tartlette pans for individual servings.

Ingredients:

  • 6 large eggs
  • 6 basil leaves
  • 3 medium zucchini
  • 1 leek
  • 2 cups shredded mozzarella
  • 1 cup grated Parmesan cheese
  • 3 tbsp olive oil
  • salt and pepper to taste
Process:
  1. Preheat oven to 350 degrees

  2. Wash and trim leek -slice in rounds

  3. Wash zucchini and chop in small pieces

  4. Heat the olive oil in large skillet on medium heat until hot and add the zucchini and leek

  5. Cook until vegetables for one or two minutes (the zucchini will still have a crunch to it)

  6. In the meantime, whisk the eggs with the Parmesan cheese and mozzarella - season with salt and pepper to taste

  7. Brush the pie plate with olive oil and add the zucchini mixture

  8. Pour egg mixture over zucchini mixture and stir to blend

  9. Scatter the basil leaves on top

  10. Bake for 30 minutes or until the frittata is sent and the top is nicely browned

ST-CSA in the News!!

Check out the article in the Lakelands Leader (p. 19) about our CSA.
"Shaare Torah Providing Locally Grown Seasonal Produce to Share Purchasers"

http://www.lakelands.org/picture/july_09_lakelands_leader.pdf

Thanks to Jess for making this happen!

Monday, July 13, 2009

Nutritional Superstars - Know What You Are Eating

Fruits and veggies are packed with a star studded array of vitamins and minerals. I admit that this is a bit obvious on the surface.

But if I was to quiz you...could you tell me where your getting what from? Don't feel bad, I too am in this camp.

Thought it might be meaningful to do a quick refresher. Beyond your daily multi-vitamin, our weekly CSA boxes are packed with nutritional goodness. The benefit is amplified from the organic farm fresh approach to how our produce is being grown.

Here is a very high level overview of key vitamins and minerals and some of the real superstars in each category:

Vitamin A (Beta - Carotene)

  • Apricots
  • Broccoli
  • Cantaloupe
  • Carrots
  • Spinach
  • Sweet Potatoes
Vitamin B Family
  • Asparagus
  • Bean Sprouts
  • Black Beans
  • Mushrooms
  • Spinach
Vitamin E
  • Asparagus
  • Avocados
  • Green Peas
  • Spinach
Vitamin C
  • Broccoli
  • Cantaloupe
  • Grapefruit
  • Lemons
  • Oranges
  • Sweet Peppers
Potassium
  • Avocados
  • Bananas
  • Orange Juice
  • Squash
  • Sweet Potatoes
  • Tomato Juice
Fiber
  • Blueberries
  • Broccoli
  • Carrots
  • Cherries
  • Dried Apricots
  • Oranges
  • Prunes and Raisins
  • Sweet Potatoes

CSA- Share Details: #9


cucumber, zucchini, onion, red potatoes, green beans, beets, salad, lettuce, (leeks)

CSA Food Project - A Experiment in Sustainable Eating   © 2008. Template Recipes by Emporium Digital

TOP  

/* ************ Google Analytics ************ */