The CSA Food Project

The CSA Food Project

Wednesday, October 28, 2009

Mustard Greens?!?!?

Mustard greens are related to kale, cabbage, and collard greens. They are the peppery leafy greens of the mustard plant. They are often less bitter than kale or collard greens, and more peppery, like arugula.


The easiest way to prepare mustard greens is to saute.

  • saute some thinly sliced onions in olive oil until they begin to brown and caramelize (maybe 5-10 min). Then toss in a couple of cloves of minced garlic

  • Throw in your mustard greens, washed and torn into large pieces, and cook until the greens begin to wilt.

  • Toss with some sesame oil or lemon juice and salt/pepper to taste.

Get creative and substitute mustard greens for spinach. How about fettuccine with mustard greens?

  • Saute as shown above, but maybe use mushrooms instead of onions.

  • Toss into cooked fettuccine with some butter, parsely, and grated parmesan cheese

Mustard Greens have lots of health promoting factors. They provide good to excellent amounts of 9 vitamins, 7 minerals, dietary fiber and protein.

Tuesday, October 27, 2009

Healthy Radish Chips (Baked)

Finding new and creative ways to prepare radishes can sometimes be a challenge.

Since we have had much success in the "chips" and "crunchy" category for recipes, I thought I would offer up the next installment: Radish Chips.

This preparation is low in calories and healthy. Essentially a healther alternative for high fat, "bad for you chips".

The recipe as listed below is for one (1) serving. This recipe scales very easily and will adjust for whatever serving size you are looking for. Cooking times in the microwave and oven will vary based on the volume that you are cooking. So adjust accordingly.

Ingredients

  • 10 radishes
  • 1 tsp chili powder
  • 1/2 tsp garlic salt
  • 1/2 tsp paprika
Directions
  1. Preheat oven to 350 degrees

  2. Thinly slice radishes

  3. Steam in microwave for 5 minutes

  4. Put in bowl with spices and mix

  5. Bake in the oven for 10 minutes, flip the chips, and bake for another 10 minutes

  6. Allow to cool and add additional spice if desired

Monday, October 26, 2009

Soup Trio: Turnip, Carrot and Split Pea

As that reality sets in that we are getting into the colder months, I find myself looking for more soup and stew related recipes.

From my perspective, one of the real benefits of soup is that most (repeat - most) soups are pretty healthy, easy to make and very filling making them a meal to themselves. I also love that you can make soup once and benefit from it for many days to come or freeze it for use on a later date.

In this recipe, the combination of turnip, carrot and split pea are excellent and highly complementary with tones of sweetness and earthiness. The vinegar splash is a nice finish/garnish for the dish.

For those of you that subscribe to the nothing left behind theory, you can use the turnip greens in the soup. Simply, clean the turnip greens and chop. They will be added at the very end of the cooking process to assure that they remain intact.

Ingredients:

  • 2 bay leaves
  • 1 onion, finely chopped
  • 2 cup vegetable stock
  • 1 cup carrots, chopped
  • 1 cup turnip, chopped
  • 3/4 cup dried split peas
  • 2 tbsp olive oil
  • Sea salt & fresh ground pepper to taste
  • splash of vinegar
Process:
  1. Wash peas and (a) soak them overnight in cold water or (b) in hot water for one hour
  2. Drain peas and set aside
  3. Heat the oil in a saucepan and sauté the onion until light brown
  4. Add the carrots and turnip and continue cooking for 5 additional minutes
  5. Add the peas, bay leaf, and stock
  6. Stir well, cover the pan, and bring to a simmer
  7. Cook for 60 to 90 minutes until the peas are really tender
  8. Stir occasionally and add water if necessary
  9. Season to taste with salt and pepper
  10. If desired, stir in turnip greens 1 to 2 minutes before removing soup from heat
  11. Serve with a splash of vinegar

Friday, October 23, 2009

Homemade Apple Juice

I stumbled upon this page today and thought I would share it. If you find yourself home from the apple orchid with too many apples - here is your solution!

Make apple juice. I doubt anyone would debate how much better fresh homemade is over that sugared mass processed stuff you find the grocery store.

I always think of these types of recipes as a great teaching activity for kids to learn about cooking, nutrition and sustainability. Let me know what you think!

Homemade Cloudy Apple Juice

Thursday, October 22, 2009

Sopa de Lima (aka Lime Soup)

Sopa de Lime is a traditional Yucatan Lime Soup. Now before you write off this soup by its name, let’s take a little bit more of a look at the ingredients and how they play off each other.

Literally translated as “lime soup”, this is more of a spicy chicken with tomato soup. Contrary to the name, limes are not the major ingredient in this savory soup. Limes are used to provide a nice tang to the soup.

It is basically a chicken vegetable soup flavored with limes and made nicely hot (if desired) with a touch of hot peppers. The avocado offers a smooth, creamy element that plays very nicely off the tang, acid and heat.

The soup is a light but filling dish. It is a great and different soup which can be served with dinner or by itself.

As a step saver, do not hesitate to use the meat of a rotisserie chicken or leftover turkey from Thanksgiving. Also, you are in control of the heat, if you wish to have none then omit the hot peppers.

There are variations of this recipe that call for Chihuahua or Monterey Jack cheese. I personally do not feel that it is necessary for the recipes. So shave off a few calories by omission of the cheese.

Ingredients:

  • 8 cups chicken stock
  • 8 ozs corn tortillas (about 6), cut into 1 inch strips
  • 6 whole cloves
  • 2 avocados, peeled and chopped into 1/2 inch pieces
  • 2 stick of Mexican cinnamon, broken up *
  • 1 lb chicken breast, chopped into 3/4-inch pieces
  • 1 lime, sliced thinly
  • 1/2 cup cilantro, chopped
  • 6 tbsp fresh lime juice
  • 2 tsp dried Mexican oregano **
  • Sea Salt to taste
  • Vegetable oil
Procedure
  1. Preheat the oven to 400°F
  2. Toss the cinnamon, oregano, and cloves onto a baking sheet and toast for about 5 minutes - make sure not to burn - check after about three minutes
  3. Transfer the spices to a bowl and set aside to cool
  4. Pour the chicken stock into a saucepan and bring to a boil
  5. Add the spices and then reduce the heat to a simmer - simmer for 10 minutes
  6. Strain the stock into another pot to remove the spices
  7. Bring the stock back to a simmer and add the chicken and simmer for 10 minutes
  8. Pour in the lime juice, and season with salt to taste
  9. Meanwhile, pour a 1/4 inch of oil into a skillet set over medium-high heat
  10. When the oil is hot, add a few strips of tortilla, and cook for about 30 seconds or until crisp
  11. Drain these on a plate covered with paper towels - repeat with the rest of the strips
  12. Ladle the soup into bowls and top each bowl with tortilla strips, avocado, cilantro, and lime slices
* Mexican Cinnamon - Canela is the Spanish word for cinnamon. The cinnamon used in Mexican cooking is the softer loose-bark variety grown in Ceylon rather than the more commonly found hard-stick cinnamon.

** Mexican Oregano - Mediterranean and Mexican oregano are two different plants, but because they are used in the same way and have a somewhat similar flavor they are both called oregano. Mexican oregano is stronger and less sweet, well-suited to the spicy, hot, cumin-flavored dishes of Mexico and Central America- perfect for chili and salsa

Wednesday, October 21, 2009

Cauliflower & Quinoa Sushi


I got to admit, this is a pretty cool concept. Rated very high on my WOW scale. It is one of those ideas that I wish I had thought of.

If you are a sushi fan and like to experiment at home, give this one a try.

It is a powerhouse of nutrition between the cauliflower, asparagus, quinoa and smoked salmon.

I think I might need to make this for an upcoming happy hour party!!!

Follow this link for the recipe

Tuesday, October 20, 2009

Sweet Potato Hummus


I am a bit ashamed to admit this but I am not the biggest sweet potato fan. It is nothing other than personal preference here.

Although it is not my first root vegetable of choice, there are times in certain recipes and preparations that I do like it. Below is one of those exceptions.

This recipe is a great and very healthy twist on traditional hummus. The addition of the sweet potato only enhances the hummus in this recipe.

While it is totally acceptable to serve with traditional pita (toasted is much better), I have found that this recipe works just as well with bagel chips, flat bread crackers, or tortilla chips.

One bonus on this recipe, it is a great make ahead. The recipe will keep for up to a week in the refrigerator after preparation.

Ingredients:

  • 1 lb. sweet potatoes, peeled and cut into 1″ pieces
  • 1 can (19.5oz) chickpeas
  • 1 clove garlic, chopped
  • 1/4 cup fresh lemon juice
  • 1/4 cup tahini
  • 2 tbsp olive oil
  • 2 tbsp ground cumin
  • Coarse sea salt
  • Fresh ground black pepper
Process:
  1. Steam or microwave potatoes until tender

  2. In a food processor, combine all ingredients

  3. Puree until smooth (about 1 min) - If needed add water to thin

  4. Season with salt and pepper to taste

  5. Allow to cool before serving

Monday, October 19, 2009

Turnip and Onions Gratin

In French, the word gratin originally referred to the tasty crust left behind in a pan after baking. This leave behind was scraped off and eaten by the chef as a bonus to the dish - think of it as “chef privilege”. Le gratin is also a French idiomatic expression meaning “the upper crust” of society.

Baking something au gratin involves heavy cream and grated cheese and/or breadcrumbs. Cooked on high heat and an oven-proof dish.

A gratin is another model of culinary simplicity that turns into food mastery.

How bad can it be?

A root vegetable cooked with onions, cheese and cream until soft on the inside and crunchy on the outside.

If you want a little more additional crunch, do not hesitate to add some bread crumbs as topping to the recipe below. My preference is Japanese break crumbs (aka: Panko).

Ingredients:

  • 1 onion, chopped fine
  • 1/2 lb turnips, peeled and grated
  • 1/3 cup heavy cream
  • 1/4 cup plus 1 tbsp freshly grated Parmesan
  • 2 tsp cornstarch
  • Sea salt and fresh ground black pepper - to taste
Process:
  1. Preheat oven to 375 degrees

  2. Butter a 9-inch-square baking dish

  3. In a bowl toss the turnips and the onion with the cornstarch, 1/4 cup of the Parmesan and salt and pepper to taste

  4. Transfer the mixture to pan - patting it down ingredients

  5. Drizzle the cream evenly over the mixture

  6. Sprinkle the mixture with the remaining 1 tbsp Parmesan

  7. Bake the gratin in the middle of oven until the top is golden brown (about 25 to 30 mins)

Friday, October 16, 2009

Butternut Squash Soup - 4 Ways


Factoid: squash was such an important part of the diet of the Native Americans that they buried it along with the dead to provide them nourishment on their final journey.

As we begin to enter into the late fall and winter harvests, there is a wealth of nourishment offered from the mildly sweet flavored and finely textured winter squashes. This includes varieties such as acorn, butternut, buttercup, turban squash and pumpkin. While these squashes become available starting in August, they are at their best during October and November.

Winter squash, members of the Cucurbitaceae family and relatives of both the melon and the cucumber, come in many different varieties. While each type varies in shape, color, size and flavor, they all have hard protective skins that are difficult to pierce that gives them a long storage life of up to six months and a hollow inner seed containing cavity.

A good source of nourishment that is very low in Saturated Fat, Cholesterol and Sodium. It is also a good source of Vitamin E (Alpha Tocopherol), Thiamin, Niacin, Vitamin B6, Folate, Calcium and Magnesium, and a very good source of Vitamin A, Vitamin C, Potassium and Manganese

The recipe below offers a base recipe for traditional creamy butternut squash soup with three flavorful variations. All make use of commonly available ingredients and are easy to make. This is a great keeper of a recipe since with a few minor tweaks you got a recipe for a different cuisine set.

Classic ButterNut Squash Soup

Base Recipe Ingredients

  • 4 to 6 cups chicken stock
  • 4 cups cubed butternut squash
  • 2/3 cup diced carrot
  • 2/3 cup diced onion
  • 1/2 cup diced celery
  • 2 tbsp olive oil
  • 1/2 tsp fresh thyme - chopped
  • Sea salt and fresh ground black pepper - to taste

Process:

Heat olive oil in a large soup pot

Add carrot, celery and onion

Cook until vegetables have begun to soften and onion turns translucent (about 3 to 4 mins)

Add butternut squash and thyme - stir to combine with vegetables

Stir in chicken broth and season with salt and pepper

Bring to a boil, reduce heat and simmer until squash is fork-tender (about 30 mins)

Using an immersion blender to puree soup or alternatively, let the soup cool slightly and carefully puree in batches in a traditional blender

Variation: Apple, Gorgonzola and Almond

Follow recipe above and stir a cup of applesauce into pureed soup. Garnish each serving with a tablespoon crumbled Rogue Creamery Gorgonzola, a tablespoon of toasted whole almonds, a few slices of thinly sliced apple and a small sprig of fresh thyme.

Variation: Thai Style

Stir a tablespoon red curry paste and 2 teaspoons chopped fresh ginger into carrot, celery and onion mixture. Cook until vegetables are tender and ginger is aromatic. Add squash, cook until tender, then add broth and 1/2-cup light or regular coconut milk. Season with salt and pepper. Puree soup and garnish each serving with 1 or 2 pappadums, a tablespoon toasted coconut flakes and a tablespoon chopped fresh cilantro. NOTE: Pappadums are available on the snack food aisle.

Variation: Southwestern Style

Add a tablespoon chopped chipotles in adobo** to carrot, celery and onion mixture. Cook until vegetables are tender. Add squash, cook until tender, then add broth. Season with salt and pepper. Puree soup and garnish each serving with 2 tablespoons crumbled queso fresco, a tablespoon cumin-toasted pumpkin seeds and a tablespoon chopped fresh cilantro.

** Canned chipotles in adobo sauce are available on the Mexican food aisle of your local grocer. Freeze any unused chipotles with sauce for future use.

Thursday, October 15, 2009

Sweet Potato Candy...UMMM????


This is one of those “different” finds on the web. After a few reads, I have come to the conclusion, why not?

The recipe is actually a pretty standard confectionary recipe with the addition of sweet potato. It actually makes sense when you think of sweet potato as an ingredient that is high in sugar and sweetness.

I was thinking that this could be a very interesting addition to Thanksgiving this year. I will certainly test this prior to Turkey Day and share my results. Likewise, I would love to get some feedback if you beat me to making this one!

I also think that this could be a fun project to do with the kids. Making candy out of potato - what fun!!!

Ingredients:

  • 2 cups light brown sugar
  • 1 cup sweet potatoes - cooked and mashed
  • 3/4 cup evaporated milk
  • 1/2 cup chopped pecans
  • 1 tbsp butter or margarine
  • 1/8 tsp salt
Preparation:

1. Put sugar, milk, butter, and salt in a large pot

2. Cook over medium heat to soft-ball stage **

3. Remove from heat and allow to cool until hand can be held comfortably on bottom of pot

4. Add sweet potatoes and beat until mixture loses its gloss

5. Add pecans, mix well, and pour into buttered pan

6. Cut into squares when cool


** Knowing when you are at soft-ball stage

Soft-ball stage refers to a specific temperature range when cooking sugar syrups. Soft-Ball Stage occurs at 235-245 degrees. This stage can be determined by dropping a spoonful of hot syrup into a bowl of very cold water. In the water, use your fingers to gather the cooled syrup into a ball. If it has reached soft-ball stage, the syrup easily forms a ball while in the cold water, but flattens once removed from the water.

Tuesday, October 13, 2009

Easy Stir-Fry with Pasta, Green Beans and Garlic


This is one of those “staple” recipes that the entire family should enjoy. Pasta and chicken with an Asian flair….what is there not to like?

The recipe is flexible, so feel free to play around with other favorite veggies.

Due to the simplicity of the recipe, this is a great opportunity to get the kiddies involved in the preparation of the meal. I am a firm believer that it is a great (not good thing) to get kids involved in cooking. Beyond learning something about cooking and spending time with your kids, meal preparation becomes an ownership thing for your children.

Kids that are involved in the preparation meals are more likely (at the minimum) to taste the meal. After all, kids want the meal to be great because they made it. A little positive feedback as a parent about how good the meal is certainly does not hurt either.

Ingredients:

  • 1 lb uncooked pasta (linguine, spaghetti or thin spaghetti is preferred)
  • 1 lb skinless, boneless chicken breasts - cut into slivers
  • 1 lb green beans - trimmed and cut in half
  • 4 cloves garlic - minced
  • 2 red bell peppers, ribs and seeds removed, diced
  • 1 cup low-sodium chicken stock
  • 1/4 cup teriyaki sauce
  • 2 tsp olive oil
Process:
  1. Prepare pasta according to package directions - drain when cooked - set aside

  2. In a large non-stick wok or skillet warm 1 teaspoon of the oil over high heat

  3. Add the chicken and stir-fry until firm and opaque (about 4 mins)

  4. When cooked, remove the chicken and set it aside

  5. Add the second teaspoon of oil to the pan and reduce to medium heat

  6. Add green beans, cook for 7 minutes covered

  7. Uncover, add red pepper, stir well and cook an additional 5 minutes

  8. Add the garlic and stir-fry until aromatic (about 1 min)

  9. Stir in the teriyaki sauce and the chicken broth

  10. Heat to a simmer and then toss with the chicken and pasta

  11. Serve immediately

Monday, October 12, 2009

Crustless Swiss Chard Quiche


Looking for a breakfast or brunch option for your Swiss chard, then here you go: Crustless Swiss Chard Quiche.

Unlike traditional quiche, this recipe is a bit lighter in the fat and carbs department with the removal of the crust and heavy cream.

For the shredded cheese - it’s your call - you can use Swiss, Cheddar, Parmesan, Asiago, Reggiano or a combination. Experiment!

Ingredients:

  • 4 eggs
  • 1/2 sweet onion
  • 1/2 bunch Swiss chard
  • 2 1/2 cups shredded cheese
  • 1 cup skim milk
  • 1 tsp olive oil
  • Sea salt
  • Fresh ground black pepper
  • cayenne pepper (optional)
Process:
  1. Preheat oven to 375 degrees

  2. Wash and dry Swiss chard

  3. Cut off the very ends of the chard stems and roughly chop chard ( NOTE: leave the chard stems intact)

  4. Preheat a saute pan with oil

  5. Add onion and Swiss Chard and sauté until stems are tender (do not overcook)

  6. Add salt & pepper to taste

  7. Whisk eggs and add a dash of cayenne pepper (if desired)

  8. Add milk and shredded cheese

  9. Fold in the onion/chard mixture

  10. Add additional salt & pepper to taste if needed

  11. Pour into a pie dish that has been sprayed with nonstick cooking spray

  12. Bake for 30-40 minutes or until golden brown and no liquid seeps when you poke it with a knife

Sunday, October 11, 2009

Dont Forget the Chard "Chips"


If you remember back during the days of Kale overload, we spoke about kale "chips".

Well the same holds true for chard. Here is a quick refresher:

  1. Toss the chard leaves lightly in olive oil and salt

  2. Lay on a baking sheet in a single layer

  3. Bake on 350 degrees for about 10 minutes or until they go to the slightly golden crispy stage

  4. When done, let cool for a few minutes - they'll be light as air and delicious

Saturday, October 10, 2009

Gnocchi with Swiss Chard & White Beans

This is an adaptation of a recipe that was feature in Eating Well earlier in the year.

It’s a simple one dish meal that is packed with flavor. It is amazing how well the flavors and textures complement one another.

You will find shelf-stable gnocchi usually with the pastas or Italian specialty items in your local grocer.

The recipe is highly flexible. Feel free to swap out or supplement the Swiss chard with arugula and/or spinach.

Also, if you want a bit more Italian flavor add a little additional Italian herb mix or fresh herbs.


Ingredients:

  • 1 (16 oz) package shelf-stable gnocchi
  • 1 (15 oz) can diced tomatoes with Italian seasoning
  • 1 (15 oz) can white beans, rinsed
  • 4 cloves garlic or small shallots, minced
  • 1 medium Vidalia onion, thinly sliced
  • 6 cups Swiss chard leaves, chopped
  • 1/2 cup water
  • 1/2 cup shredded part-skim mozzarella cheese
  • 1/4 cup finely shredded Asiago cheese
  • 1 tbsp plus 1 tsp extra-virgin olive oil
  • 1/4 tsp freshly ground pepper
Preparation
  1. Heat 1 tsp oil in a large nonstick skillet over medium heat

  2. Add gnocchi and cook - stirring often, until plumped and starting to brown (about 6 to 8 mins)

  3. Remove gnocchi from skillet and set aside

  4. Add the remaining 1 tsp oil and onion to skillet

  5. Cook onions over medium heat for about 2 minutes

  6. Add in garlic/shallot and water

  7. Cover and cook until the onion is soft (about 5 to 7 mins)

  8. Add the Swiss chard and cook, stirring, until starting to wilt (about 1 to 2 mins)

  9. Add in the beans, tomatoes and pepper

  10. Bring contents to a simmer

  11. Add in the gnocchi and sprinkle with cheeses

  12. Cover and cook until the cheeses are melted and the sauce is bubbling (about 3 to 5 mins)

Friday, October 9, 2009

Freezing Swiss Chard

You might consider freezing some of your swiss chard for winter use.

To freeze:

1. Prepare a sink of cold water. Rinse chard through several changes of water lifting leaves out leaving sand and soil behind. Then separate the stems from the leaves.

2. Bring 4 quarts of water to a rolling boil. Drop about one pound of whole leaves in boiling water, cover and blanch for 2 minutes (blanch stems for 3 minutes).

3. Remove chard from water and immerse in an ice water bath for 2 minutes. Drain.

4. Pack in zip-closure freezer bags or freezer containers, leaving no headspace. Label, date and freeze at zero degrees for up to one year.

Source: pehling bay farm

Thursday, October 8, 2009

Simple Balsamic Swiss Chard with Garlic


I have sensed the Swiss Chard panic.

I have heard the cries... What to do with the Swiss Chard - It is so beautiful but I have no idea what to do!!!

So here is a recipe that is about as simple as simple gets.

Swiss chard cooked with garlic and balsamic vinegar.

Quick, nutritious and delicious! Made with all common pantry items.

Ingredients

  • 1 bunch Swiss chard, stalks discarded, leaves cut into wide ribbons
  • 4 cloves garlic, minced
  • 1/4 cup balsamic vinegar
  • 2 tbsp extra-virgin olive oil
  • Sea salt (to taste)
  • Freshly ground pepper (to taste)
Process
  1. Heat the olive oil on a large skillet over medium heat

  2. Add the garlic and cook until tender and aromatic (about 2 mins)

  3. Add the Swiss chard and balsamic vinegar

  4. Cook and stir until the chard is wilted and tender (about 5 mins)

  5. Season with salt and pepper to taste

Wednesday, October 7, 2009

Swiss Chard - Quick Ideas For Use


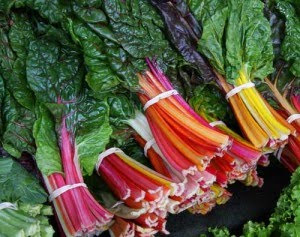
Swiss chard is a versatile and beautiful green rich in color, flavor and nutrition.

It is great as a side or as a core ingredient in making main dishes heartier.

Similar to spinach and beets with a flavor that is bitter, pungent and slightly salty, Swiss chard is truly one of the vegetables with exceptionally impressive list of health promoting nutrients.

In a nutshell, Swiss Chard is:

  • Low in saturated fat and cholesterol
  • High in Dietary Fiber, Vitamin A, Vitamin C, Vitamin E, Vitamin K, Riboflavin, Vitamin B6, Calcium, Iron, Magnesium, Phosphorus, Potassium, Copper, Manganese, Thiamin, Folate and Zinc
Beyond its health benefits it is a highly flexible ingredient that you can incorporate into sandwiches, quiches, frittatas, and pastas.

Below are a few quick ideas for ways to use Swiss Chard:
  • Sauté chard with garlic or shallot in olive oil. Put a cover on the pan and allow chard to steam for about 5 minutes. Add a squeeze of lemon juice (and if desired, some hot pepper flakes) before serving.
  • Blanch the leaves and add to soup
  • Try substituting chard for spinach or arugula in soup or lasagna recipes
  • Make a gratin with the stems: Boil the stems until tender (about 30 minutes). Put them in a gratin dish, add seasonings (such as a little garlic and parsley), top with a béchamel sauce and cook under broiler until golden brown.
  • Blanch the whole leaves and stuff them with meat or vegetable fillings
  • Add sautéed or blanched with pasta with toasted pine nuts, a good hard cheese and good olive oil
  • Make a chard spanikopita
  • Add to polenta, quinoia or rice dishes
  • Braise chard and serve with white beans or lentils

Tuesday, October 6, 2009

Autumn Inspired Pear Salad

There is something to be said for simplicity in meals.

Simplicity does not mean compromise and this salad is a great example of that principle.

Strong in flavor and easy in preparation, this salad brings out the true flavors and feels of autumn in one powerful dish.

Ingredients:

Salad:

  • 2 medium Anjou or Bosc pears, cored and thinly sliced lengthwise
  • 3 ounces blue or gorgonzola cheese, crumbled
  • 9 cups mixed greens
  • 3 tbsp chopped walnuts
  • 3 tbsp dried cranberries
Dressing:
  • 1/3 cup rice vinegar
  • 1/3 cup olive oil
  • 2 tsp cranberry juice concentrate
  • 1 tsp Dijon mustard
  • Sea salt and freshly ground black pepper
Process:
  1. Whisk together vinegar, juice concentrate and mustard in a small bowl

  2. Slowly add oil, whisking until blended and thickened

  3. Season with salt and pepper to taste and set aside

  4. Mix greens in a large serving bowl or split among serving plates

  5. Top with sliced pears, crumbled cheese, walnuts and cranberries

  6. Drizzle salad with dressing and serve

Monday, October 5, 2009

Delicata Squash - Try This Next Time!!!

Considered to be a novelty winter squash, I am sure many of you have seen them in the local grocer and easily over looked it.

It is that long oblong-shaped squash with a cream colored, green striped thick outer skin and a golden fine-textured inner flesh. The squash can range in size from 5 to 10 inches and average between one and two pounds.

Delicata squash is actually one of the tastier winter squash varieties and has a nice mild taste with a creamy pulp that is similar to sweet potatoes.

It can easily be used as a substitute for butternut squash or buttercup squash or sweet potato in recipes.

When purchasing look for small, firm squash with bright yellow or orange skins that have green veins branching like lightning through them.

When preparing cut squash in half lengthwise, scoop out the seeds and slice into thin half-moons. Peeling of the skins is optional.

The squash can be cooked the following ways:

  • Oven: Bake at 350 degrees until knife soft. Because of their sweetness no additional sugar or sweetner should be needed.

  • Microwave: Place squash in a large glass baking dish or microwave-safe bowl with 1/4 cup broth (or water). Cover tightly and microwave on High for 10 minutes.

  • Sauté: Melt 2 teaspoons butter in a large skillet over medium heat. Add squash slices; cook, stirring frequently, until tender, about 10 minutes. Stir in a pinch of grated nutmeg before serving.

  • Steam: Place squash slices in a steamer basket over 1 inch of water in a large pot set over high heat. Cover and cook until tender, about 6 minutes.

A Quick Sesame Ginger Broccoli Stir Fry


Here is a super simple stir fry for broccoli.

The technique is to quickly stir fry the broccoli and then steam the broccoli in the liquids (stock, sesame oil and soy sauce). The end result, perfectly cooked broccoli that is rich in flavor and has an excellent texture.

This is a very classical stir fried recipe that pulls in traditional "stir fry" flavors (if there is such a thing). One word of caution, always use oil that has a high flash point for stir fry. This would include canola, vegetable, grapeseed or peanut oil. You do not want oil that will burn or smoke or catch on fire, therefore we use oils with higher heat tolerances.

While you might be inclined to throw out the broccoli stalks since they are too tough, try this suggestion. Using a peeler, remove the outer skins exposing the softer inner flesh. Chop the flesh into bite sized pieces and add to the stir fry.

If you want to expand this to a full blown meal, add in a protein and some other vegetables (carrot, bamboo, water chestnuts, celery, mini corn, or onion). Based on the size of your expanded fry, you might need to double up on the sauce.

Ingredients:

  • 1 lb fresh broccoli florets (and stems)
  • 1/2 cup chicken or vegetable stock
  • 1 tbsp soy sauce
  • 1 tbsp sesame oil (dark sesame preferred)
  • 1 tbsp sesame seeds
  • 1 tbsp fresh garlic - minced
  • 1 tbsp fresh ginger - minced
  • 1 tbsp canola oil (may require more)
Process:
  1. Toast the sesame seeds in a sauté pan on medium heat - cook until lightly browned
  2. When sesame seeds are browned - remove from heat and set aside to cool
  3. Heat canola oil in a large sauté pan on medium high heat
  4. Add the broccoli and stir to coat the florets with the oil - sauté for about a minute
  5. Clear a space in the middle of the broccoli and add the ginger and garlic
  6. Add a little more oil to the ginger and garlic (about a teaspoon) and sauté until fragrant (about one minute)
  7. Stir the garlic and ginger in with the broccoli
  8. Add the stock mixture to the pan - bring to a simmer, reduce the heat and cover
  9. Cook until broccoli is fork firm (about 2 to 3 mins)
  10. Remove from heat and remove broccoli with a slotted spoon to a bowl
  11. Return pan to heat, increase heat to high and boil down the liquid until just a couple tablespoons remain
  12. Turn off heat and return broccoli to the pan
  13. Add the toasted sesame seeds and toss with the liquid

Saturday, October 3, 2009

Tabouleh


In the realm of salads, I think it is safe to say that Tabouleh (also spelled tabouleh or tabouli) is like no other. A Middle Eastern dish made of bulgur wheat, finely chopped herbs, and spices. Tabouleh is often served as an appetizer, a salad, or part of a mezze, the Middle Eastern equivalent of tapas.

Tabouleh is thought to have originated as a mountain dish from the Eastern Mediterranean, it has become one of the most popular Middle Eastern salads

Made with fresh veggies, olive oil and spices, it can be eaten in pita bread, scooped onto pita bread, or eaten with a fork.
In the Middle East, fresh grape leaves are used as a scoop.

Tabouleh can be made with a variety of veggies according to your tastes. Feel free to experiment with what you like. There are no fast, hard rules here - add carrots, cucumbers, red or green onions. If you want a more hearty salad, add romaine lettuce. You can also consider swapping out the bulgar for quinoa or orzo for an alternative Tabbouleh salad. As with all recipe alterations, taste as you go.

Ingredients:

  • 6 medium tomatoes, diced
  • 2 bunches of fresh parsley - stems discarded
  • I medium onion, finely chopped
  • 1/2 cup bulgur - medium grade
  • 6 tbsp lemon juice
  • 6 tbsp extra virgin olive oil
  • 2 tbsp of fresh mint - chopped
  • 1 tbsp sea salt
  • 1/2 tsp fresh ground black pepper
Preparation:
  • Soak bulgur in water for 1 1/2 to 2 hours in cold water until soft

  • Squeeze out excess water from bulgur using hands or paper towel

  • Combine all ingredients, except for salt, pepper, lemon juice, and olive oil

  • Sprinkle olive oil, lemon juice, salt and pepper on top

  • Serve immediately or chill in refrigerator for 2 hours before serving

Friday, October 2, 2009

Simple Edamame Salad


Edamame is a popular Asian ingredient which has caught on in other parts of the world. Edamame is nothing more than young soybean. The beans are harvested before they start to harden. They are usually quickly parboiled and frozen to retain their fresh flavor.

There are a number of ways to eat edamame, ranging from plain out of hand as snacks to processed in sweet and savory dishes. One of the most traditional ways to eat edamame is in a lightly steamed or boiled form, whole in the pod and salted. Just pop the beans out of the shell as you eat them. The kids love this!!!

The beans can also be added to salads, sandwiches, and soups. Cooked edamame can be eaten hot or cold. Edamame is pretty available at Asian grocers, large grocers, and health food stores. It will be located in the produce section in fresh form or with the frozen veggies.

This is a simple salad that is healthy in veggies. The salad is rich in flavor with a minimal amount of oil.

Ingredients:

Salad

  • 1 lb frozen shelled edamame
  • 3 cups frozen petite corn kernels
  • 1 red bell pepper - chopped
  • 3/4 cup green onion - sliced on the bias
  • 1/2 cup red onion - finely chopped
  • 1/4 cup fresh Italian parsley - chopped
  • 2 tbsp fresh oregano or basil - chopped
Dressing
  • 1/3 cup fresh lemon juice
  • 2 tbsp Dijon mustard
  • 2 tbsp olive oil
  • 3/4 tsp sea salt
  • 3/4 tsp fresh ground black pepper
Process:
  1. Prepare edamame according to package directions

  2. When finished, drain and rinse edamame with cold water - set aside to drain thoroughly

  3. Prepare the dressing by whisking lemon juice, mustard, olive oil, salt and pepper

  4. Combine edamame, corn, red bell pepper, green onion, red onion, parsley, and oregano (or basil)

  5. In a large bowl, veggies and dressing - toss to coat

  6. Refrigerate until ready to serve

Thursday, October 1, 2009

A Great Little Apple Cheatsheet

With the massive proliferation of apple varieties in the grocery store, it can be a bit overwhelming to know what apples are best for what purposes. The Washington Apple Commission his provided this great little chart on what the best uses for particular varieties of apples. Hope it helps!

CSA Food Project - A Experiment in Sustainable Eating   © 2008. Template Recipes by Emporium Digital

TOP  

/* ************ Google Analytics ************ */